Design
|
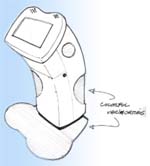
We knew some of the needs of the kiosk—that it must be easy to clean, durable, and "friendly" looking. We also knew there could be no doubt in a six-year-old's mind that this is a toy. And since we didn't have much experience with different types of touchscreen or wheelchair accessibility, we began looking for a designer with some more experience in the field. Adam Aronson of Arc Design proved to be just the man for the job. |
|
After asking several fabricators to bid on the actual construction, we decided to work with some classmates of ours we knew we could trust—Interbots.
The Positive
|
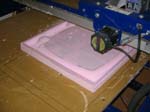
Interbots used a C&C router to make the original foam shape onto which a resin would be laid. By doing so, they were able to make an extremely faithful recreation of the digital model. It took five days for the machine to finish; after that, the sanding began. |
|
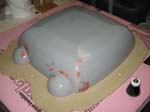
The layers of foam were glued together, smoothed out, and then a resin shell was added. The team spent many, many hours waxing and smoothing the positive, preparing it for casting into a (negative) mold. |
|
The Mold
|
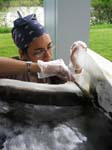
We could have made the resin into the actual kiosk, but Children's Hospital encouraged us to take the time and build a negative mold so that we could make more kiosks easily in the future. |
Assembly
|
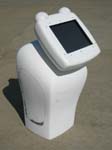
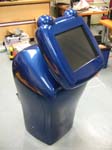
Once the fiberglass was cast in the mold, it was assembled, sanded, and polished. Then it was painted. Finally, the touchscreen and computer were added. |
|
Installation
On June 22, 2006 we bolted our first kiosk to the waiting room floor and turned it on for the first time.