
In week 6, we made a great process on our project.
We built the basic model of our game, developed the basic network function of our game, and also started to do the concept art design.
For Game Design Part
At the beginning of the week, we came up with a idea about a existed board game called zombie in my pocket. This game allowed the two player to explore the maps, find some objects, and finally escape from the map. During the exploration, player may meet some difficulties or gain some helpful items. There is time limitation for this game, which requires that two player escape as fast as they can.
After several play test, we found that this game is a very good model while the mechanics of the game need to be further developed to allow more interaction between two players.
Then our designer further developed the mechanics of our game, and do another board play test on Friday.
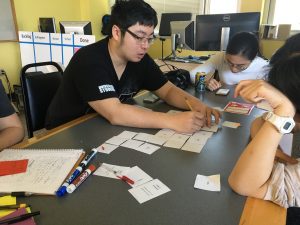
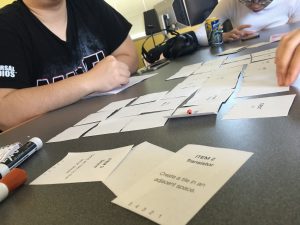
we are doing the playtest.
The newest version of our game is based on the origin version and then developed a new mechanics which is that each tiles have its own health, and when player walk through it, it will lose health. When its health down to 0, the tile will fall down and destroy.
There are still many items and events in the game needed to be further developed, while we have settled down the direction of our game currently.
For Technical Part
We built a document to keep tracking the development of our project.
-
Setting Up Two Oculus Devices
This is a two-player game and requires two set of Oculus devices linking together.
For the First step, we linked two Oculus devices including Rift and Touch to two separate test computer, and use our computer to remote control the test computer. However, we found that when using remote mode to control the test computer to test our game, the Oculus Runtime SDK could not work properly. I have tried different methods such as re-install the runtime SDK and used administration account, but it still not works. Finally, we decided to use our computer for development, and use GitHub to manage the version of our project, then use a test computer to pull from Git and test.
-
Building the Project
After configuration and download the needed oculus plugin and GitHub environment, I build our project called InTouch and initial the GitHub project. Here is our project GitHub address:
https://github.com/luanhaoqing/InTouch
-
Setting up basic synchronize of two player movement
We went through the official tutorial of unity network functions, and build a basic scene including the synchronize of two player’s movement using NetworkManager, NetworkIdentity, and NetworkTransform. Then the two players could see each other’s movement in unity window. This unity package of the network is based on the model of one player host the server, and the other could join the game by entering the host’s IP address.
-
Setting up basic synchronization of two Oculus device.
I met some difficulties in setting up the two Oculus devices. At first, I did the same thing as I did before for the two Oculus devices. Each time when a player joined the game, it will automatically generate an Oculus prefab. However, I found it works very wired; it would blink, and also control the other’s movement. After I had tried different possibilities, I found the reason is that the built-in function of Oculus would try to control both of the prefabs of Oculus. So I tried to modify codes in the Oculus controller function, while it still not works well.
Finally, I figured out a way to solve this problem without modifying codes of Oculus. I use the idea of proxy to create a new set of objects to reflect the movement of the player.
I use codes which attached on the Player object to get the movement of the Oculus and touch and then pass them to the objects which will be synchronized with the other. After several tries, I finally find it should use Network Transform Child function instead of Network Transform function. So the configuration of Player is like this:
And each part of the objects such as Left Hand, Right Hand has a network transform attached.
-
Spawn Points of players
To allow each player to start in their designated position once they login, I use Network Start Position function of Unity to realize the basic function. Firstly, I added two Spawn points, and the two player prefabs would be generated there. However, I find that because of the player would be synchronized to the Oculus, so that in start function, I set the Oculus position to Spawn position.
-
Basic setting for turn-based actions
In order to make anything work in the game, we need to build a basis of turn-based actions. That is, saying “your turn”, and “my turn”.
To set the basic turn base mechanic, I did a lot of research. For the newest version of Unity network function, for a two player game, there are totally six same scripts running at the same time.
And the player who hosts the game is a client as well as a server.
So I divide the code into two parts: Server parts and Client parts, and count the time in the server, and sync to the client.
For Art Part
For Art part, we decided the environment concept as well as Avatar concept.
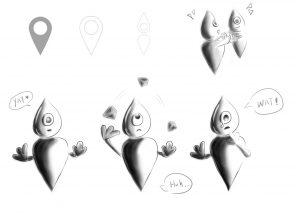
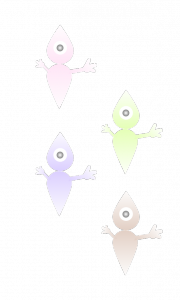
the concept art of Avatar.
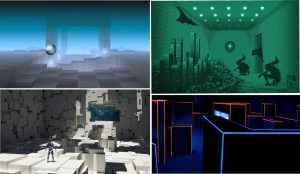
The concept of Environment.
For Next Week
ART
-
TO DO:
-
Jiaxin: Environment concept
-
Xin: Art concept
- Erika: avatar modeling
-
TECH
-
TO DO:
- Begin establishing grid
DESIGN
-
TO DO:
- Reiterated game rules based on notes