Week 6
Fabrication + Tech
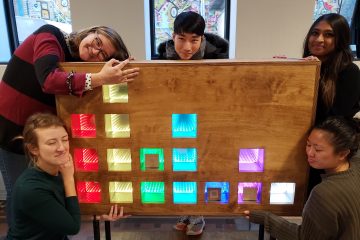
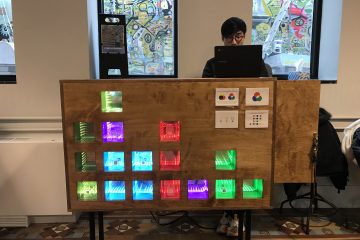
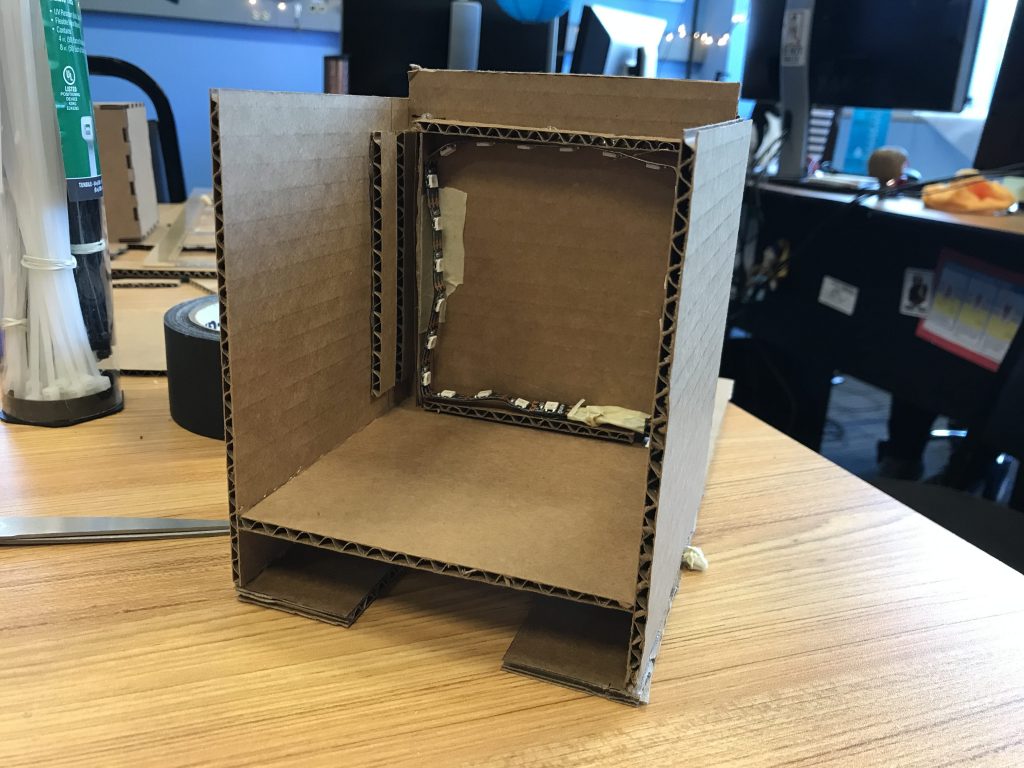
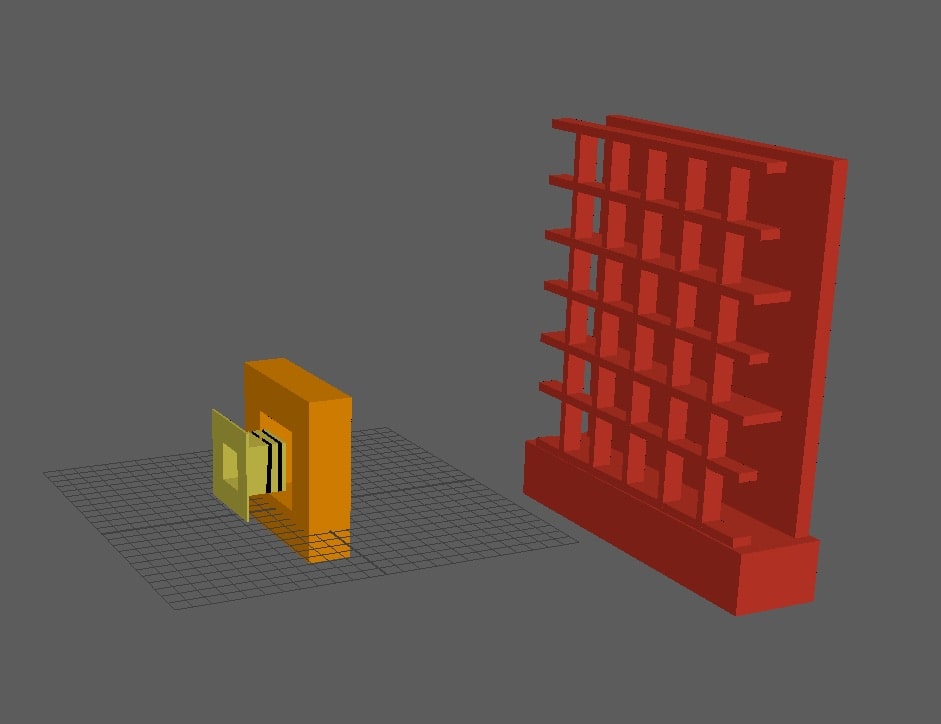
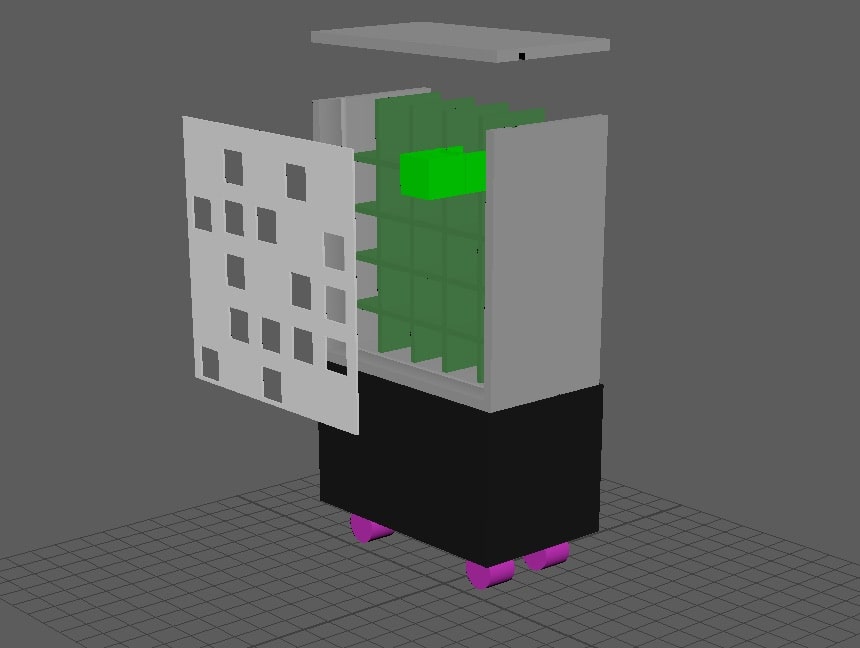
As promised, we finished our first gold spike! This was our first attempt at combining together the hardware and the fabrication. See our baby below:
As mentioned in last week’s blog we were testing the following:
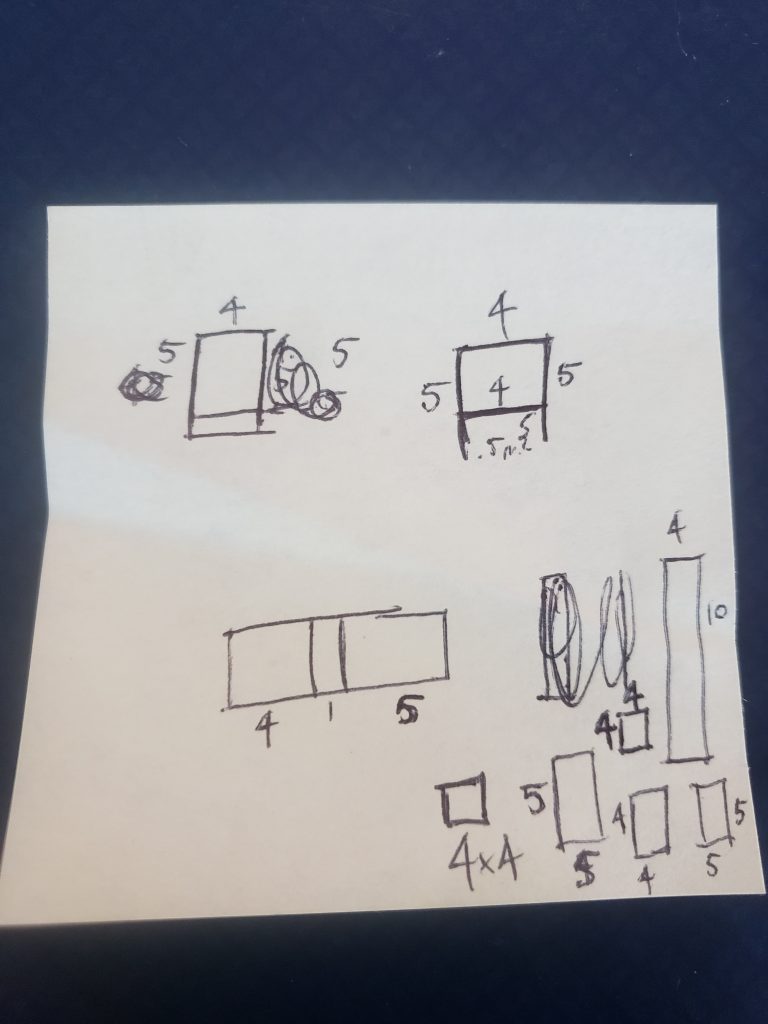
- Size of the cubbies (how big does the cubby need to be to allow the light to show and for easy access and removal of blocks?)
- Type of recessing (all the way through the installation vs. having a back)
- LED light arrangement (back of the cubby vs. all the way around)
- RFID tags and receivers (does this work?)
We found that:
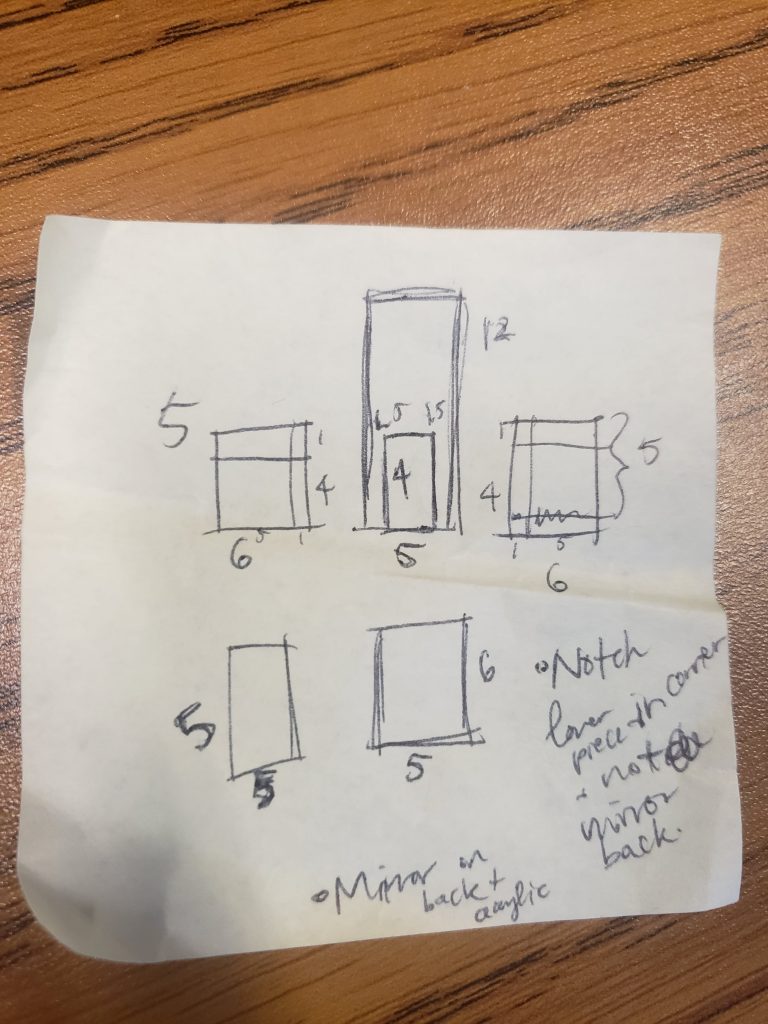
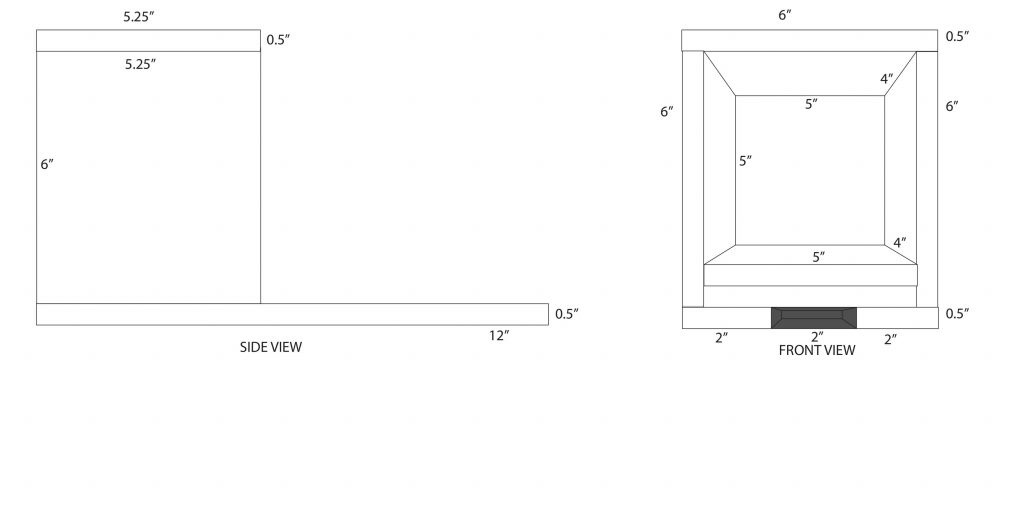
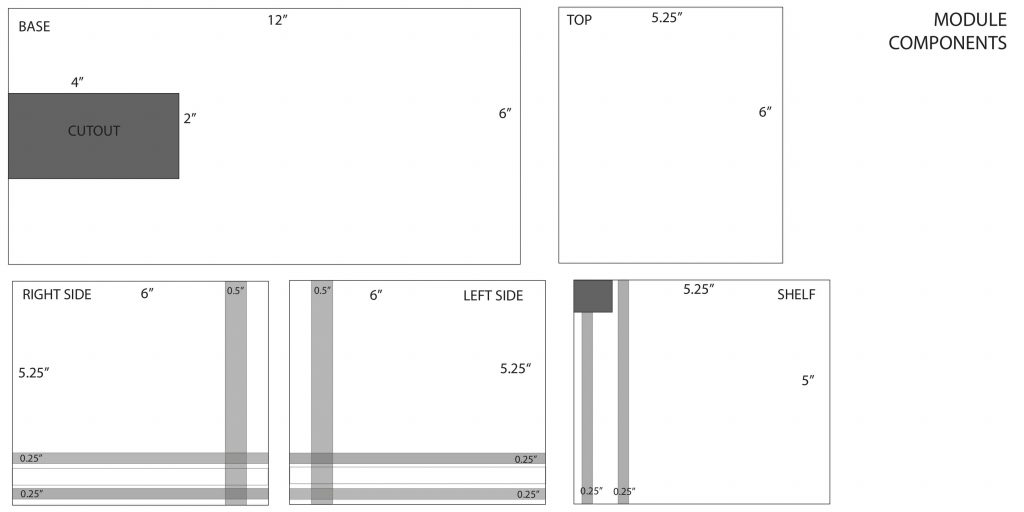
- 5 in cubby sizes was ideal, with 3.5 in blocks to go inside (the 3.5 in block is a design constraint of the RFID cards that are the most reliable and consistent to use with the receivers – these cards can only be cut down to a 3.5 in width).
- The recessing should NOT go all the way through. The structure is weakened by this, and we don’t want the blocks falling out of the back of the installation.
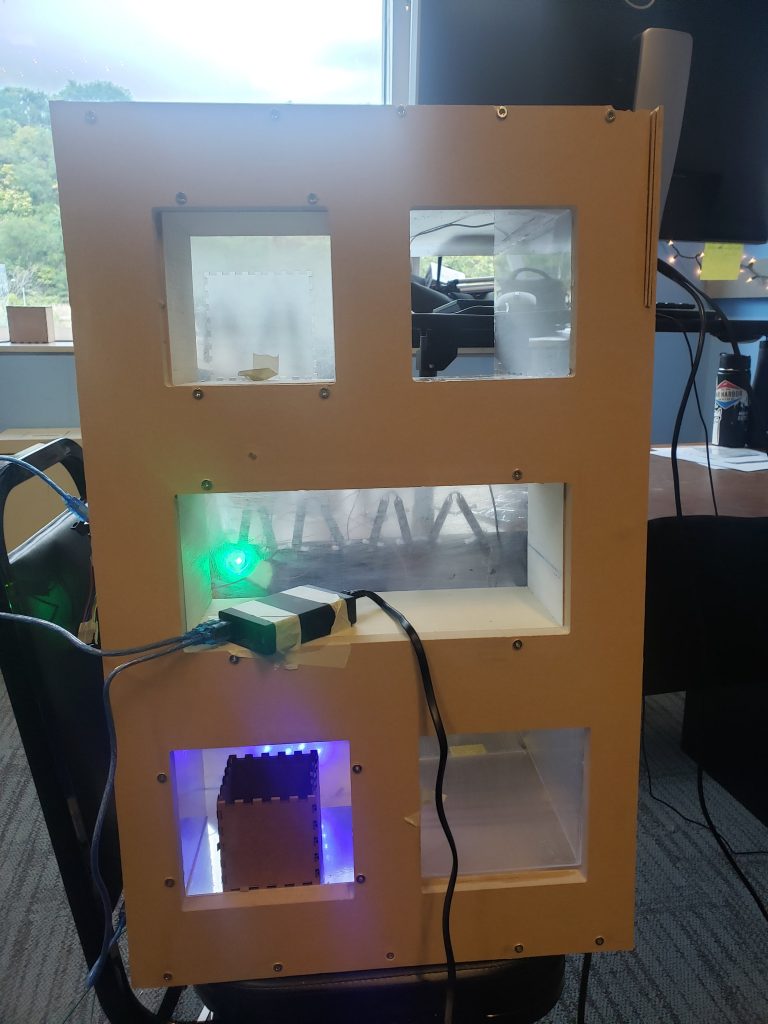
- We’re still not sure about the LED light arrangement, as Maria Montenegro had mentioned creating an infinity mirror effect and we’d like to try this!
- We got the RFID tags and receivers to work! However, the cubbies need to be less deep so that when the block is placed in, it aligns perfectly with the receiver and creates less of a margin for error for the guest.
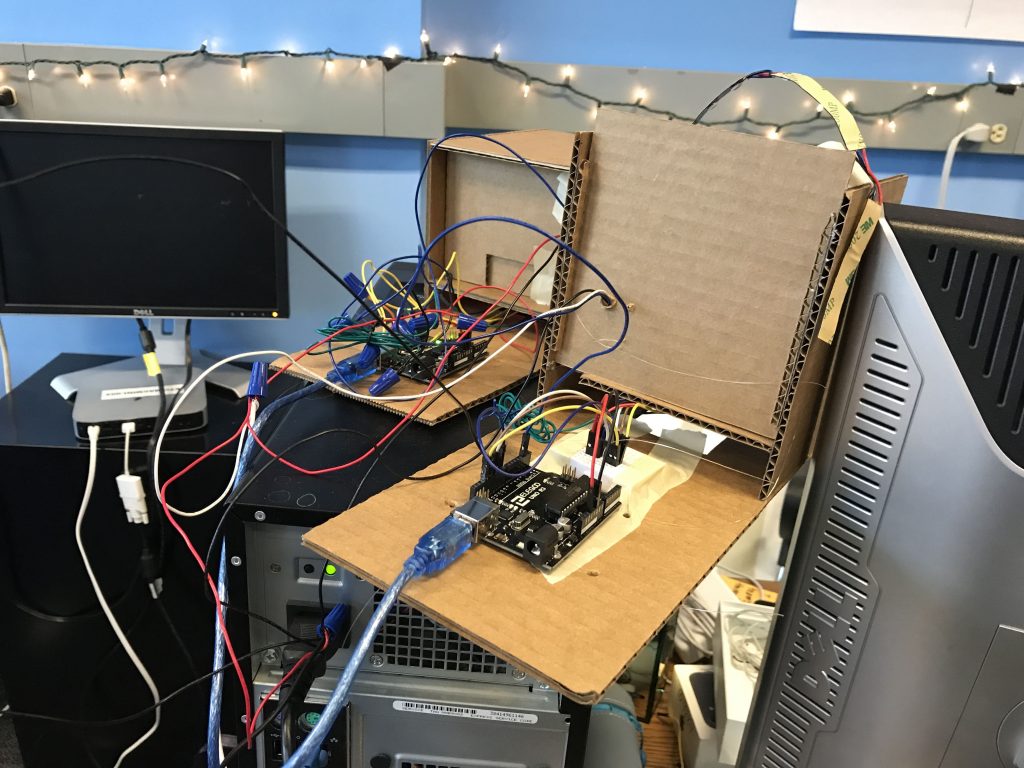
- We tried to connect three RFID receivers to one Arduino, but found that the LED lights either lagged or inconsistently responded. This may have something to do with the RAM on the Arduino not being able to handle three sets of LED lights and three receivers or we soldered wires poorly.
- Assembling all the wiring, power source, and LED lights post-assembly of cubbies is very difficult. Even though, we had allotted enough space in between each cubby for the wiring, we didn’t account for the size of our hands! Even Nidhi, who has tiny dainty hands had a hard time assembling around the structure.
- We need longer wires!
- We need to build in holders for the RFID receiver, Arduinos, and power source into the cubbies.
- The MDF thickness that we chose was too heavy, we can go down a size without sacrificing robustness.
- Given the size of the cubbies, and the necessary spacing between the cubbies, we decided to limit the number of cubbies to 15, which would cover a 5ft x 4ft installation, which we decided is feasible for us to fabricate and move.
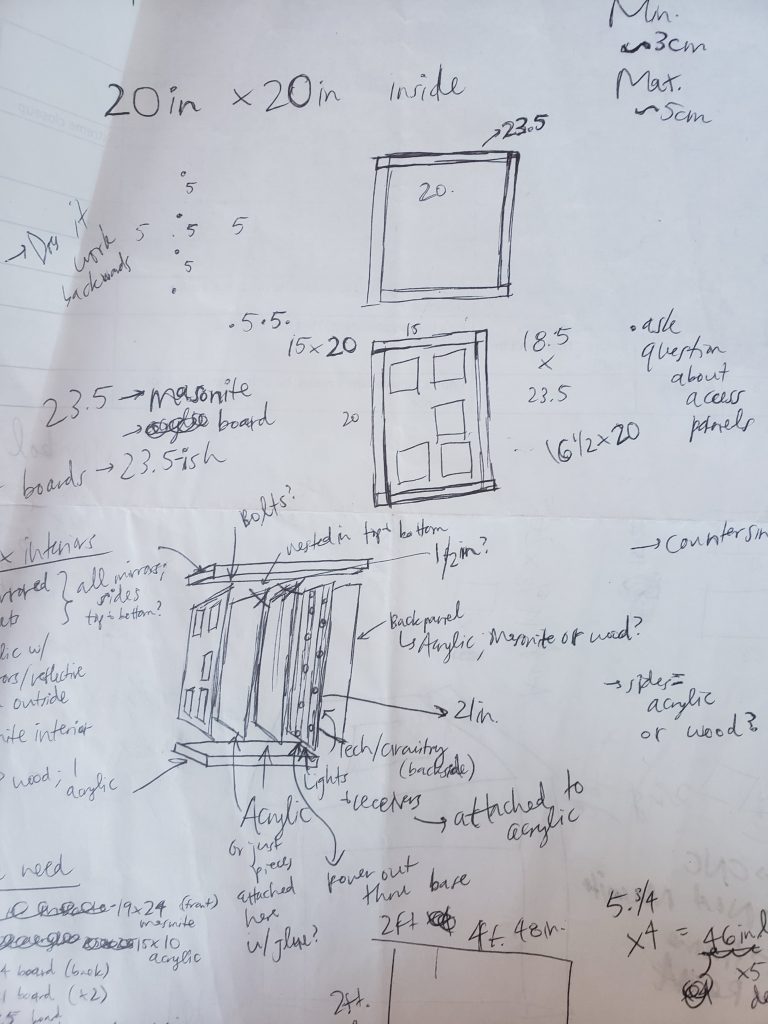
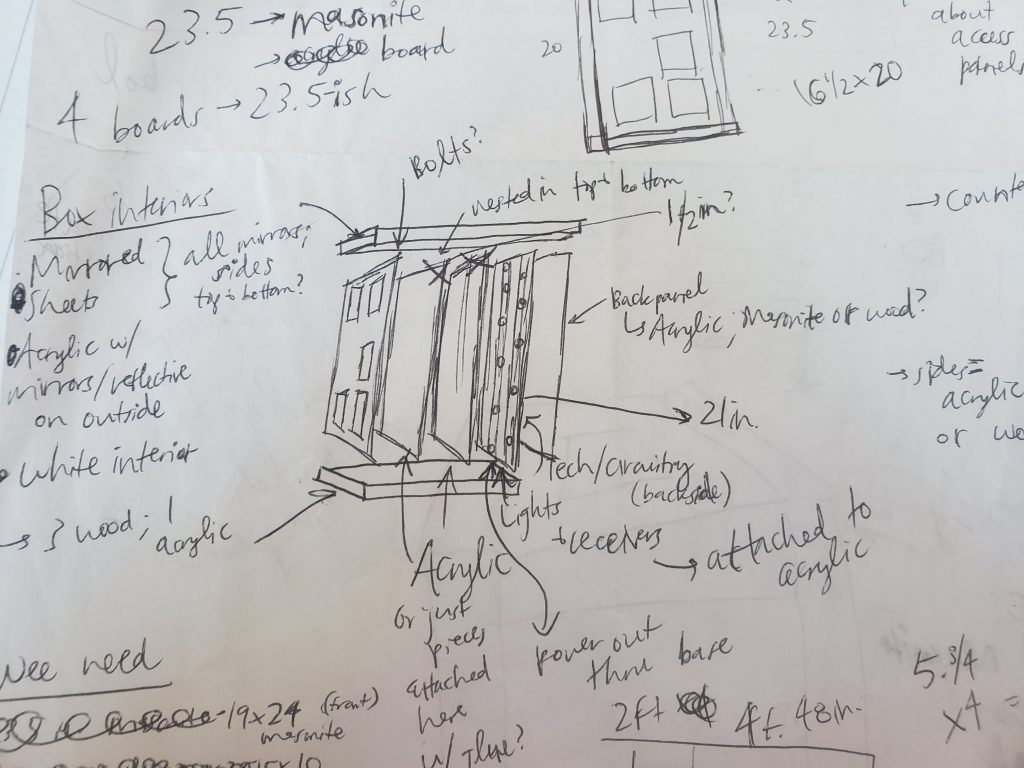
Our next step is to build Gold Spike #2 (or more accurately #2, #3, and #4)! We took Maria’s advice and decided to move forward in building our experience out of modules. We will perfect the design of one module, which consists of a cubby, LED lights, RFID receiver, and Arduino. We will then replicate this three times, so that we can also figure out how to get all of the modules to talk to each other.
Next steps for fab + tech:
- Fabricate cardboard prototypes of the module structures to figure out how to assemble tech into (Done!)
- Experiment with infinity mirrors and LED light arrangement (waiting on materials, but LED lights are in!)
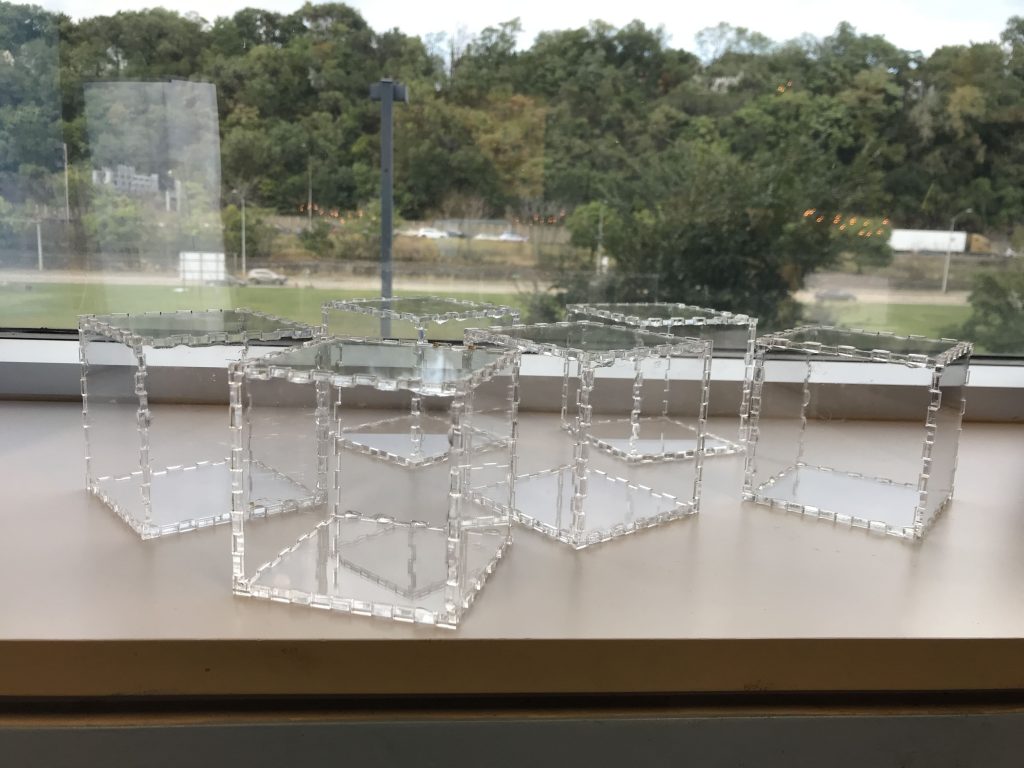
- Once the module blueprint is validated in the cardboard prototype with confirmed LED light arrangement, fabricate three modules out of a stronger material. (First draft done!)
- Prepare all of the tech for the module install (waiting on materials)
- Convert interactions into LED output (in progress)
- Program Arduinos to communicate with each other (in progress)
- Assemble tech into the modules (waiting on modules)
Concurrently, the team will:
- Design and prototype a “frame” to hold all of the modules (in progress)
- Experiment with different materials for the blocks that will hold the RFID cards (waiting on materials)
The goal is not only to finish these before Halves, but to also playtest and refine. Unfortunately, since our Gold Spike #1 is not stable enough to transport we will bring our cardboard modules to playtest next Friday at Avonworth Elementary and to the MuseumLab.
Once we’ve perfected the module, all we will have to do after Halves is replicate for the final installation!
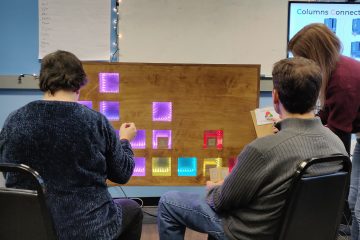
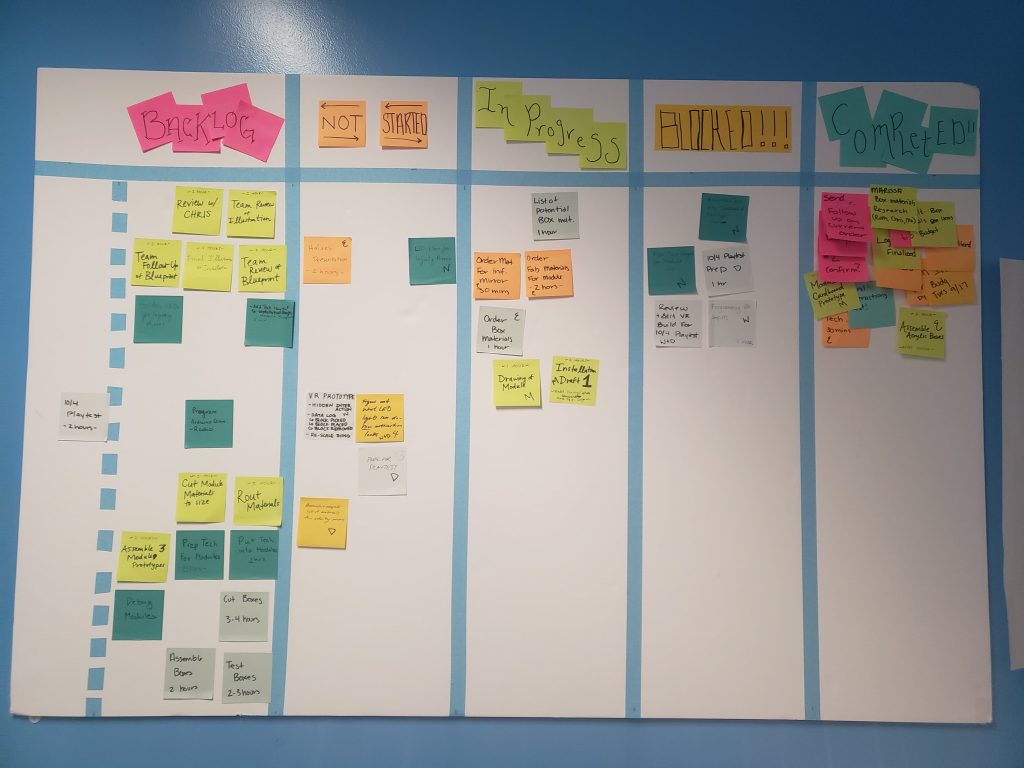
See our updated SCRUM board here:
Playtesting
This week, we went to Avonworth Elementary School to playtest with 5th graders. For this playtest, we brought the VR prototype and we intended to guide play during the experience (ask students to focus on the installation and not with playing in VR). We had planned on testing the following:
- Test the new feedback mechanisms
- Test the hidden interactions
- Do guests find them?
- Scale the VR prototype to size with 15 cubbies and 12 cubes
- Change cubes to opaque
- Are guests engaged?
- What is the pattern of play?
- Do we see thoughtful placement?
- Do we see random placement?
- How long does it take the guest to figure out the logic?
- What is the pattern of play?
- Do guests want a goal?
- What do guests expect?
- What are guests trying to do?
- What do guests want to do?
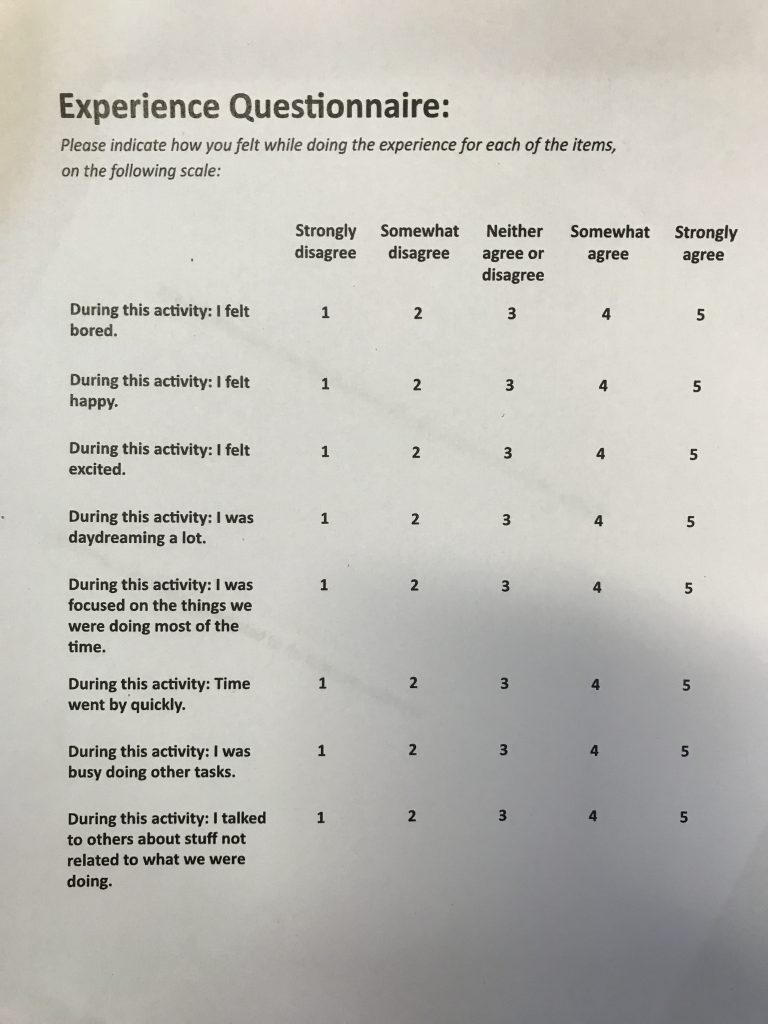
We also changed our survey to utilize The Activation Lab’s Engagement Survey. This resource was recommended to us by Maggie Hannon (see last week’s blog), and is for 10-14 year old students to gauge engagement in a STEM activity.
However, we didn’t have the right adapters in our traveling VR kit! Marissa tried to valiantly purchase a new adapter while we were there, but to no avail. So unfortunately we were unable to playtest.
Luckily, the teachers and students were really flexible and positive about the whole experience. Instead, Marissa and I provided a 20 minute talk about our project, our process, and about failure!
We talked about how our creative process is just like the scientific process. We ask questions, come up with experiments, we test, and then we analyze our data. We also talked about how sometimes things just don’t go right and it’s out of our control. You can only do your best and hope for the best.
Marissa and I both have informal STEM education backgrounds, and for us it was a nice experience to be able to talk to young students again. Especially to be able to show them that failure is ok and that it happens to adults too! So while it wasn’t ideal, we did provide a good learning opportunity for the students and it helped us to gain some perspective on the project.
Next Friday, we will return to Avonworth to playtest our VR prototype and bring our cardboard modules!
Emily and Nidhi went to the MuseumLab to playtest during our scheduled Friday playtest slots. Unfortunately, there were only 3 students available to playtest. Kay (the Artist in Residence) who runs the space, suggested that we begin looking at the school’s schedule to figure out the best times to come visit. When students are let out early, students will typically flood the space. We will have to continue to work on our communication to facilitate a better playtesting schedule.
Meetings
At the beginning of the week, our faculty advisors suggested the following:
- Focus on transitions – crossing the threshold?
- Need to create a dependencies schedule – what are the critical paths?
- Ok to use leading questions now that we know VR is super distracting
- Start thinking about why this is not better in VR
- Think about the game Petals Around the Rose
On Friday, Emily and Marissa met with Mo to show him the proposed installation and get his feedback. He suggested the following:
- Recommended potentially finding a vendor to use for CNC Work
- Didn’t like wheels on the installation- felt they wouldn’t do it justice and if it can move, it will be moved.
- Likes space where 2 adults can move it
- Wants it to be more secure than just locks on wheels (Kids will undo it and move it)
- Recommended making it “Attractive as Hell”
- People being able to go behind the wall and see the back could enhance the illusion of the infinity mirror
- The solution to the base could just be a matter of finding the right table
- People with architecture background could be good to consult
- Reach out to/ consult with Visionary Effects http://www.visionaryeffects.com & Deadwood Custom https://www.deadwoodcustom.net/
- Pittsburgh companies that do fabrication
- Silicon- Not robust- could ask companies above about it if make contact
- Maybe the part we buy is the blocks?
- Cut the casing open, add in the chip, and seal shut
- Thinks the acrylic will eventually fall apart
- To 3D print cubes- recommends using a UV Polymer 3D Printer
- https://www.stratasys.com/3d-printers/objet30-pro
- Allows to control transparence
- See if Ideate has one?
- Look into Stone Composite Material that can be made to look seamless?
- Corian or Hi-Macs
- Maybe make the cube smaller- it will block the effect otherwise
- Consider making payoff of interaction bigger to allow guests watching to also enjoy the experience
Next week, we will:
- Prep for halves presentations
- FAB FAB FAB (one FAB for each module)
- Playtest!