PREVIOUSLY ON FORESIGHT…
In our previous practice, the team did the previz completely based on script and none of us has seen the movie before. We got familiar with the previsualization process, learned how to identify the key visual storytelling elements, and got our own pipeline working.
On Wednesday, we watched the original movie together with advisors to wrap up the first practice and we had a discussion about some creative decisions of the movie that we didn’t expect:
- Instead of doing the shadow getting longer image which is described in the script, they use a close-up in a glass window and rack the focus from the reflection of the bank to Butch’s face behind the glass. This is a smart use of the real space and a more interesting way to start the whole movie and introduce the character. Also, we believe another important reason is that – it makes the budget way more worthy to start with a CU of Paul Newman’s face, instead of his shadow.
- The lighting created a strong contrast of the highlight and the shadow. It wasn’t mentioned in the script, but the contrast definitely build a mystery and dramatic ambiance for the movie.
- When Butch is scowling at the bank, the film uses cross-cutting to build the tension. The pacing of the sequence is well mapped by the editing.
After learning more about how creative decisions are made in a movie set, we wanted to focus more on how to achieve specific shots and how to better use key storytelling elements while creating assets and acquiring performance. Thus, we decided to do recreation in our next previz practice.
FORESIGHT – NEW EPISODE!
We chose the script from Moonrise Kingdom, a Wes Anderson movie, as our next project. The team watched the movie together and picked the first scene in the scout camp to break down. There are 6 different characters in the scene. The clip we picked can be broke down to 7 shots, and as it’s a Wes Anderson movie, the main camera movements are tracking and tilting.
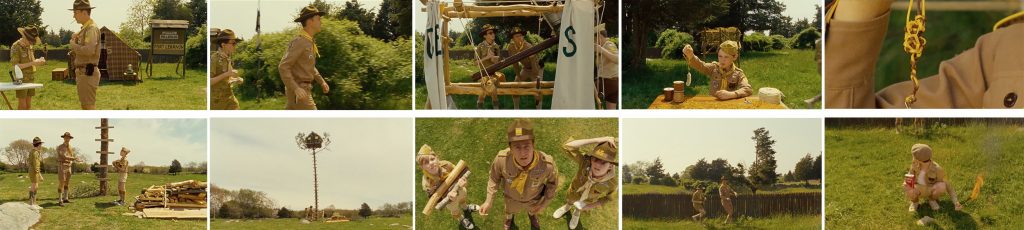
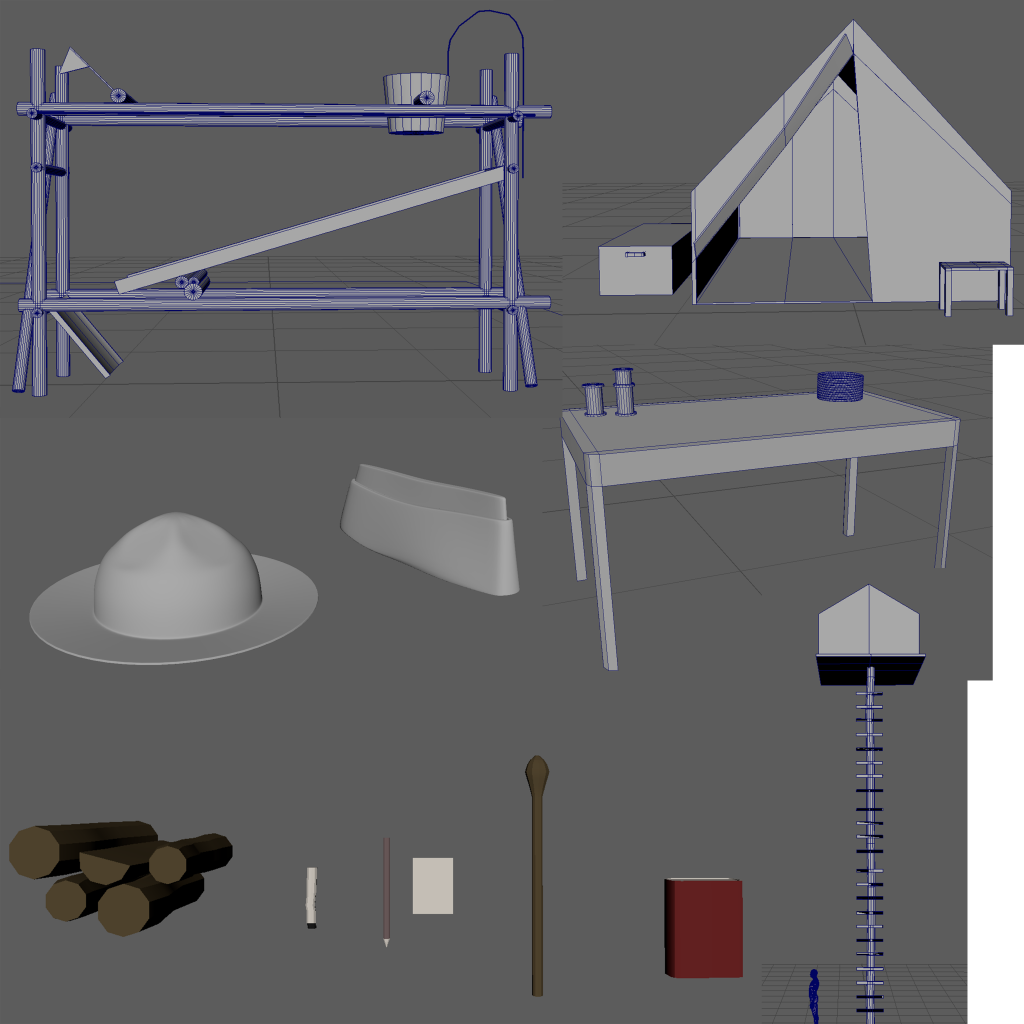
First, we identified the detail elements that differentiate characters, and the story elements that are necessary for the story beats.
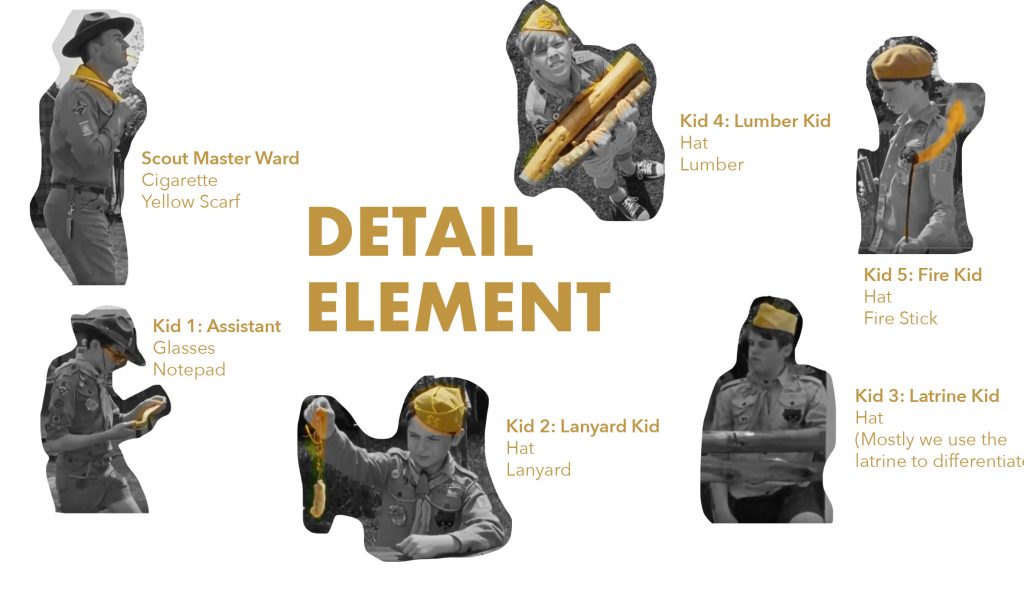
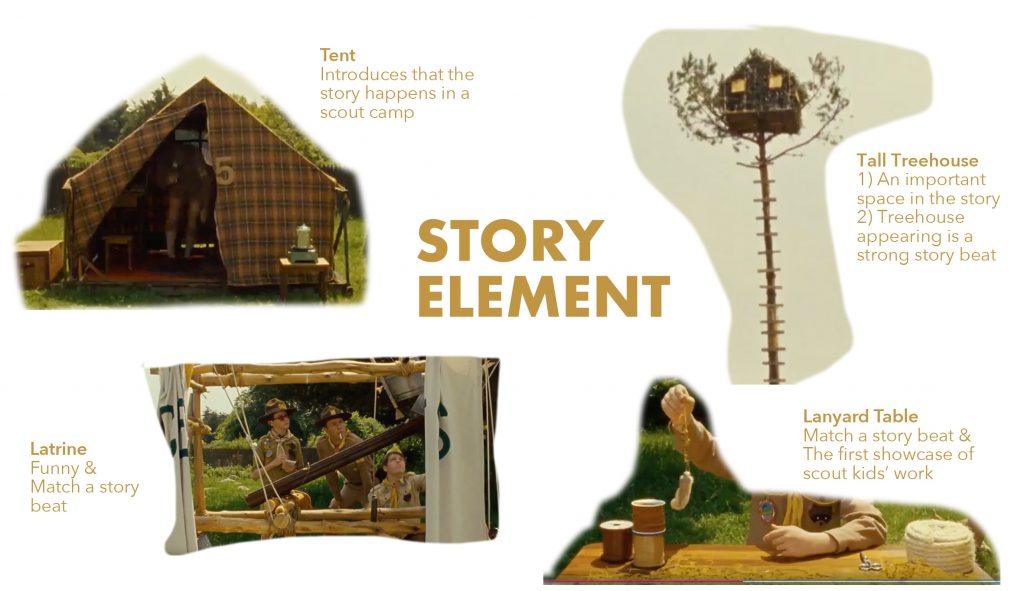
Based on our discussion, Shera and Arnav finished the 3D assets for these necessary elements quickly. Meanwhile we started capturing the performance for each character. Shera further refined the design of the character and Arnav did the sculpt block out for the model. Next up – the facial features and retopology for rigging.
While capturing the performance, here are some problems we encountered:
- Tracking
- Feet often not picked up by lighthouses.
- Waist tracker needs to be fit into belt loops, and it may be shaky.
- Movement limitations
- Vive tracking space is limited. The space can’t cover the whole virtual set.
- When the actor turns, tracking and body parts can get stuck in weird poses.
- This will be a major hindrance if moving to live performance with the camera system.
- Mapping
- Performer may wear trackers at different positions on their legs each time.
- Weird offset in hand tracking after move to SteamVR to incorporate Vive tracker – fixed to an extent.
- Bending is challenging because of limited points of input.
- Legs sinking below ground on bending.
- Actors need to be conscious of movements – like how the wrists, elbows are bending or how the body is shaping up. Actors need to be perfectly positioned during the mapping stage for best results.
- Capturing multiple actors is still challenging in terms of calibrating and all of the reasons above.
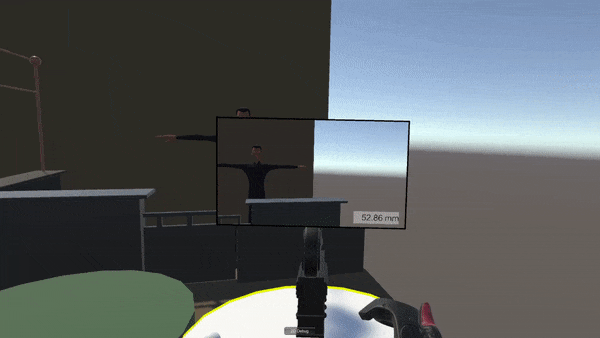
Varun worked on fixing the problems, and most of them get a lot better now. Here’s the video of one of the takes we recorded for the first shot.
CAMERA SYSTEM PROGRESS
Performance
Since we found that our VR scene explorer will suffer framerate drops when the recorder is enabled, the first thing Kevin tried this week is to profile and see if any optimizations can be done. From the Unity Profiler, we learned that the recording will use ~5ms in each frame (which is a lot for VR!) Since we are using the Unity Recorder plugin to record videos, there is (sadly) not much we can do to make it faster except for lowering the resolution of the render texture for our “director” camera in game. The second bottleneck Kevin identified is the rendering of the canvas for the camera view in game. Kevin splitted the static UI components (text for showing focal length, if the camera is recording, …) from the dynamic ones, but the frame rate did not improve much. “Since we still have more features to implement for the Moonrise Kingdom scene, I decided to call it a day and return to our performance later if I have extra time after halves…”, said Kevin.

Panning
The other thing we implemented this week is the panning of the camera. To achieve that, Kevin plugged in the CircularDrive component from SteamVR’s interaction example, and it works (of course with some code tweaks)! The one thing Kevin found when implementing the panning is that the hierarchy for the ViewFinder is a mess now, partly because we need to rotate it 45 degrees around the x axis for it to look normal with the Vive controller.
The next step for the camera system will be tilting up and down. Meanwhile, Shera and Angela will start designing a simple but friendly UI for the camera system.
CHARACTER DESIGN
While creating assets for Moonrise Kingdom, we also did further research and design for the character set.
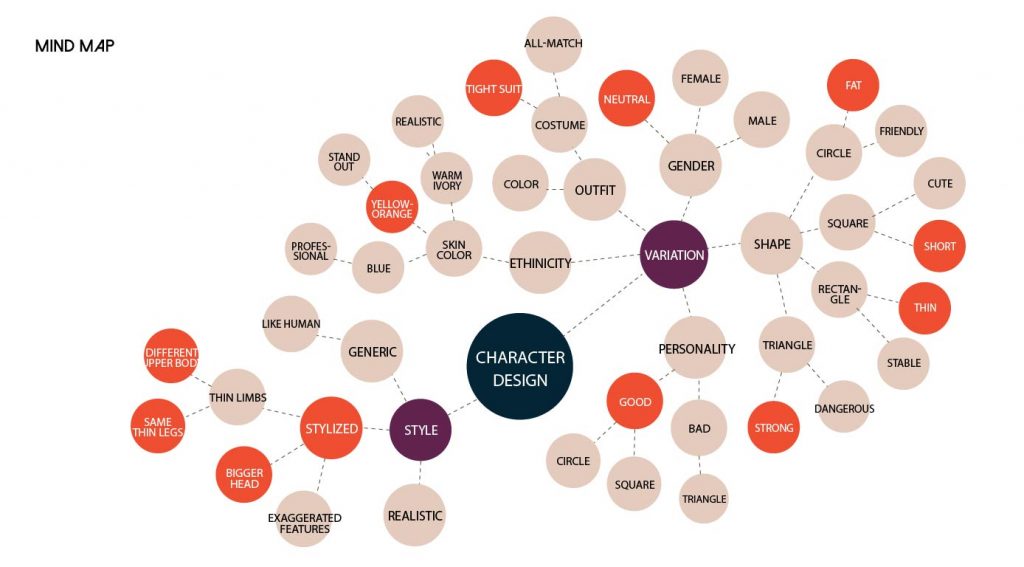
For the characters, our goal is to make a stylized but also unique characters which easily represent four main body shape: thin(regular), fat, strong, short. We will use one mesh all along and blend shape it into various characters. We first make a mind map to help us brainstorm the essential elements of our characters and what’s not.
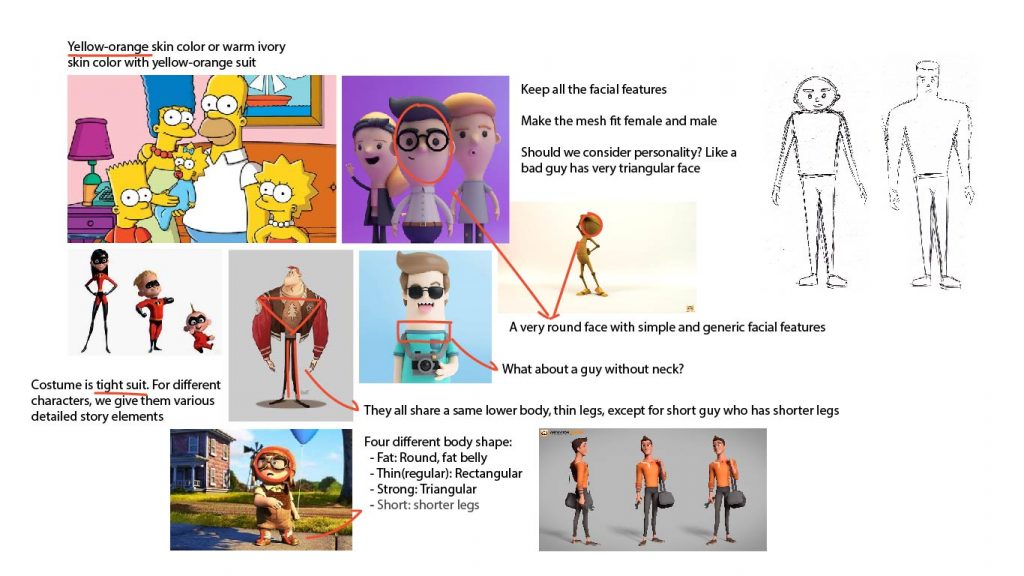
Then, we found some references and listed a few iterations and inspirations we got from these pictures. These characters are all very unique and stylized but strongly illustrate their main features. For example, the yellow skin color of The Simpsons and the very triangular upper body shape of the strong guy in the middle.
Later, we iterated and drew a few sketches of the characters. Below is the clear outline of the different characters. This is a start of the character design and we will work on the 3D characters based on these basic iterations.

For these characters, They all share a same head and lower body(legs, feet) Also, they don’t have a very butt-butt. It includes in the oval-ish upper body. This strong guy has a triangular upper body, and the chest is much stronger than the waist. We make the waist so small to stand out the strong chest and arms and the shoulder is very wide. Its arms are stronger but the scale of elbows are as small as the regular one’s to make a comparison. For the thin guy, he has very thin limbs, round head and the elbows and ankles are thinner than the arms and thighs. The short guy mostly represents as a kid so I keep the head bigger than adults. He has shorter legs, 2/3 of the regular one’s. The fat guy has a much rounder upper body, especially the fat belly. Its arms are fat too but this time its elbows are as fat as the arms, not like the strong guy. And the female characters stand out the “S” body curve by the chest and waist which is different from the male.
The research and design sketch help up us understand much better about what our standard character set should look like.
WHAT ELSE?
Interviewing Industry People
In this week, we also talked to a previz artist from Magnopus and an ex layout artist from Pixar to gather point of views. We will upload all the interview documentations we’ve got so far in another catogory.
HALVES IS ON THE WAY!
One week away from 1/2 presentation!! Another intense week is coming…