Week 12
DESIGN
We tweaked our storytelling experience’s design to focus on the game’s core loop. With this in mind, we added context to the storytelling experience in a way that the resulting experience is a cinematic experience.
The context of our experience is still a film boot-camp as discussed in the Week 10 blog post. However we are focusing on the video recording phase and animation phase. Here is a look at the broad overview of the design and the fiction associated with each phase.
- You are briefed about your role (stunt double)
- You are instructed by the facilitator (stunt director) about ideal conditions for shooting videos like lighting, clothing, environment (Location Scouting)
- You will be instructed (directed) to do movements based on prompts (script) which will be used in the resulting movie.
The end result will be an animated film sequence in which the players (stunt doubles) will see how their stunts looked in the film and they will get visual cues giving them positive or negative feedback about their movements during the playback. This is important since the players need to know about how the technology performs and can adjust their movements accordingly when they replay the experience.
We tested this experience with our faculty and got a lot of feedback. The feedback was mainly about the video shooting experience, which felt really long and monotonous in its current state. We will work on making this shorter and more effective. We also got feedback about the animations. The animations recreated in Unreal were very shaky and additionally the recreation looked imperfect.
PROGRAMMING
We worked on fixing the playback speed of the animations. The playback speed is now similar to the original videos. However the payoff for the players is still very low since the animations are usually very short lived and last around 2 seconds. One design consideration we made is using techniques to emphasize those animations and increase their effect and payoff which we will discuss next week.
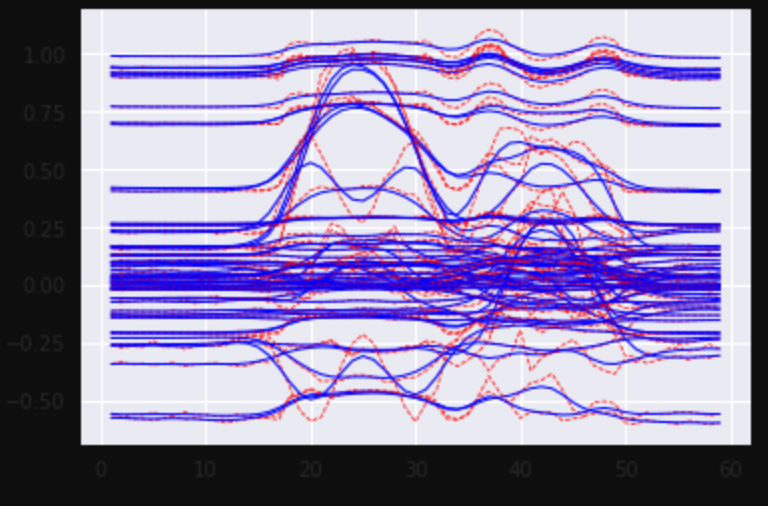
We also worked on improving the quality of animations and tried a motion smoothing approach which produced very good results. Here is a short clip of the result. The animation on the left is the smooth animation and the one on the right is the original animation
This approach used a digital filter function from the open-source Python Library SciPy. Here’s the link to the documentation of the function for your reference. Using this function significantly improves the quality of animations but also slightly reduces the range of motion. In the image below, the red lines show the signal before smoothing while the blue lines show the result after smoothing.
ART
As our client suggested, we tried to use a variety of characters to see if we can achieve better range of motion in the characters. We created a different model of the cat with longer limbs and an even more human-like body.
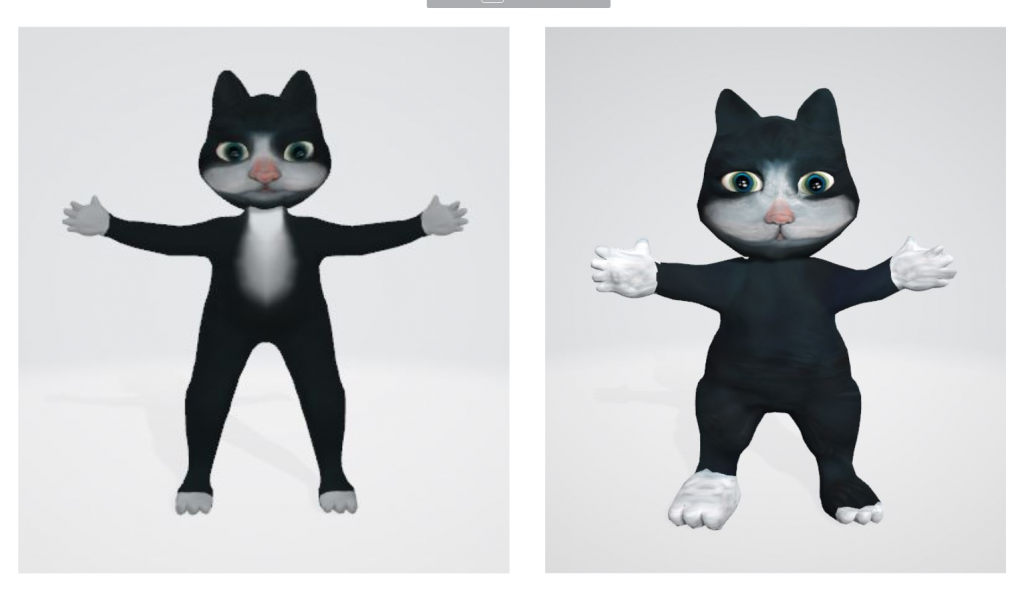
We put this new model in our demo and the resulting animations seemed to have a slightly better range of motion. We will continue to test with different characters and meshes to find the most appropriate option.
Next Week
We will show our progress to our client next week . We will also work on making the animation recreation better. We will also work on making the pay-off worthwhile and make the animations the most enjoyable part of the experience.