Week 9
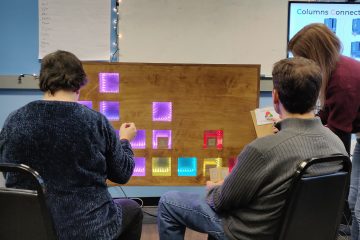
We started off this week with a check-in with the MuseumLab staff. Emily and I met with Chip Lindsey (Director of Education), Anne Fullenkamp (Director of Design), and Katie Koffler (Educational Partnerships Manager) to update them on our design. We brought our prototypes to demo.
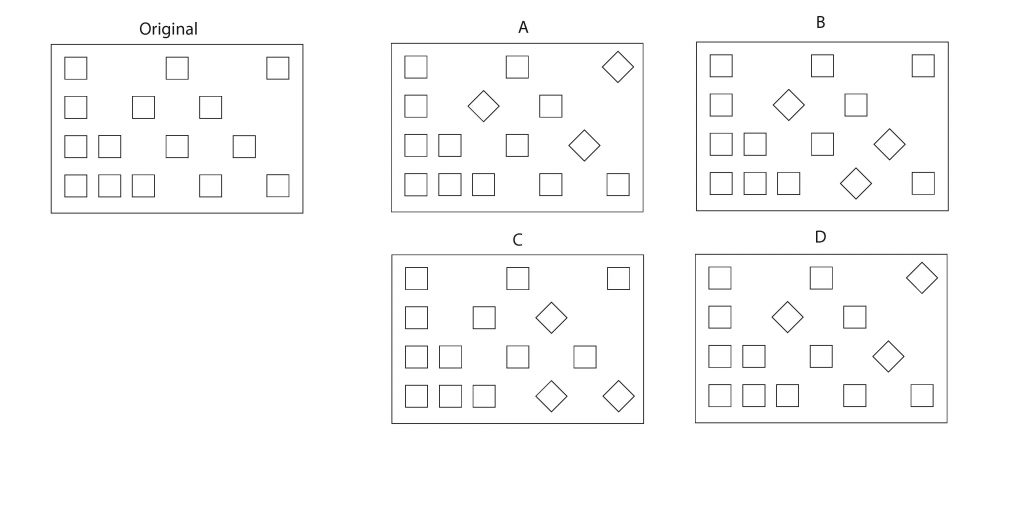
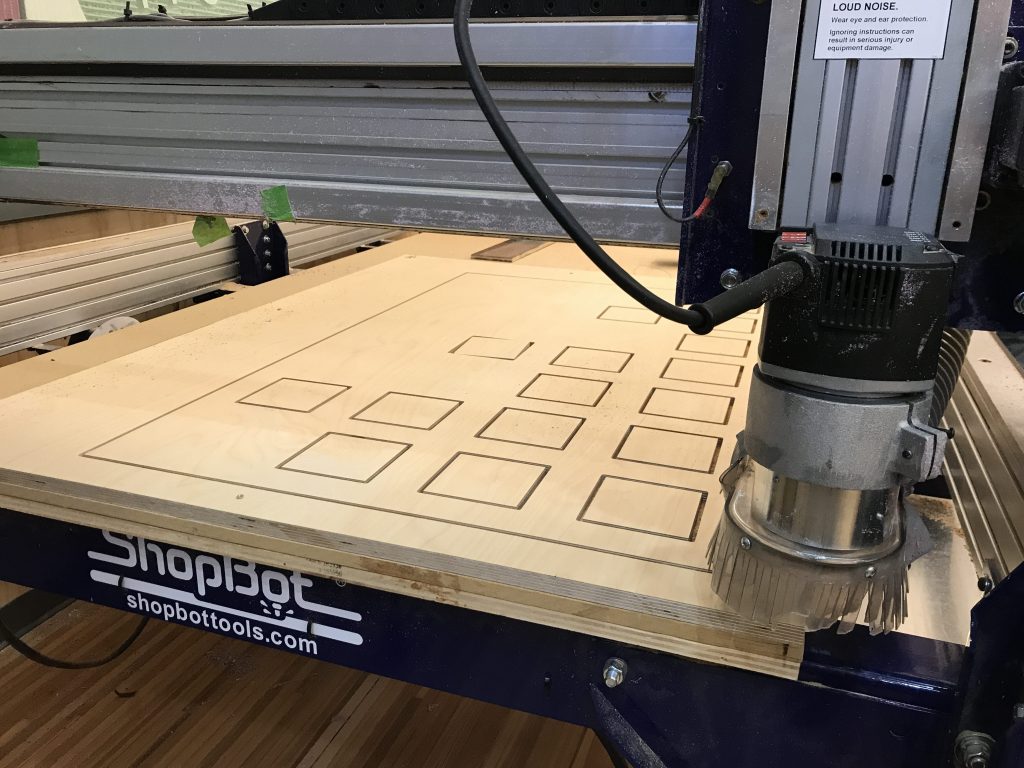
They were really excited about the design of the modules, but wondered about the number and pattern of the fabrication layout. Why 15 boxes instead of a square number like 16 since all the components are square (we have since changed to 16 since that makes a lot of sense)? They stressed making every part of the design intentional, and recommended looking at Edward Tufte’s work in turning arbitrary patterns into systems. They thought that we made something beautiful and they liked the open-endedness of the experience.
They wondered if it would be possible to have the modules be free-floating or accessible from all sides. They were excited about exposing the technology and stressed creating an experience that allows the guest to understand their decisions. They were also excited to see the potential of this experience to be scalable; they imagined 50+ modules, a kit that students could create their own at home, and games that could be added if the modules were networked.
They told us not to worrying about the symbols on the boxes, as it becomes another experience about symbol language.
They also discussed the difference between the Children’s Museum and the MuseumLab; it’s more about the WHY? What do all these things do? They suggested labelling the experience to providing language to the exhibit and how the components work. They didn’t like the cabinet that was holding all the modules, because they wanted us to embrace the joy of seeing “the inside out.” The way that the MuseumLab looks, with exposed brick and Carnegie steel is what they believe in for this space. They suggested that we spend more time designing for the experience, and not worrying about robustness, since the point is for experience in the MuseumLab to look rough. They were very excited about the idea of free-floating modules that could be plugged in and activated by the guests.
After that meeting, Emily and I had a lot to discuss with our team. Our clients were very excited about the idea of the modules being free-floating, but would our team and advisors be excited about it as well? We only have 6 more weeks, with ETC Playtest Day coming up in one week. Is it possible to pivot and should we?
We decided to explore the idea to see if it was feasible.
- Nidhi had to discuss with David Purta how to create individual power supplies to each cubby that were going to be reliable (since currently we had planned for only 2 plugs for the experience, one for arduinos and one for LED lights).
- Wei had to reconsider interactions and communication, since radio would no longer be possible, how could we use the currently existing tech that we know is reliable to create hidden interactions.
- Marissa had to consider how to retrofit our modules to have a back that would encase, but also expose the tech.
- Daryl had to consider alternative structures that would consider the Museum’s suggestion to be able to approach the experience from all sides.
After spending two days mulling over it and discussing with subject matter experts and our faculty advisors, we collectively decided to not proceed with the Museum’s suggestion of free-floating modules.
David Purta had let us know that Arduinos are not meant to constantly plugged and unplugged, and that action could fry the device randomly. Mike also worried that our experience would become a toy instead of a tangible interface that you could make hypotheses (which is our player experience).
Ultimately, due to reliability, safety, and cost, we would not be able to pivot at this point of the semester. We hadn’t designed or planned for this change. However, there are other ways in which we may be able to satisfy the Museum’s needs. We’ll provide a few free-floating modules for the Museum to have nearby the experience to showcase the “inner guts” of the technology.
From this experience, we learned a valuable lesson: while it’s important to appeal to the needs of your clients, it’s also important to stick to the vision of your experience, be realistic about deadlines, and what you can accomplish (avoid being stuck in Ross’s scenario at all costs). No amount of pivoting will get you out of a tight turnaround. Planning ahead and knowing what you’re in for is the best way to prevent getting stuck (literally).
Fab + Tech
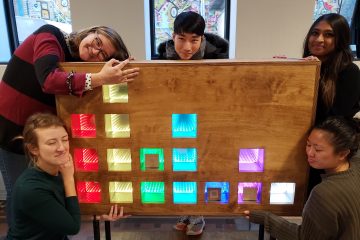
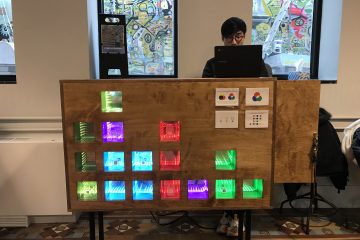
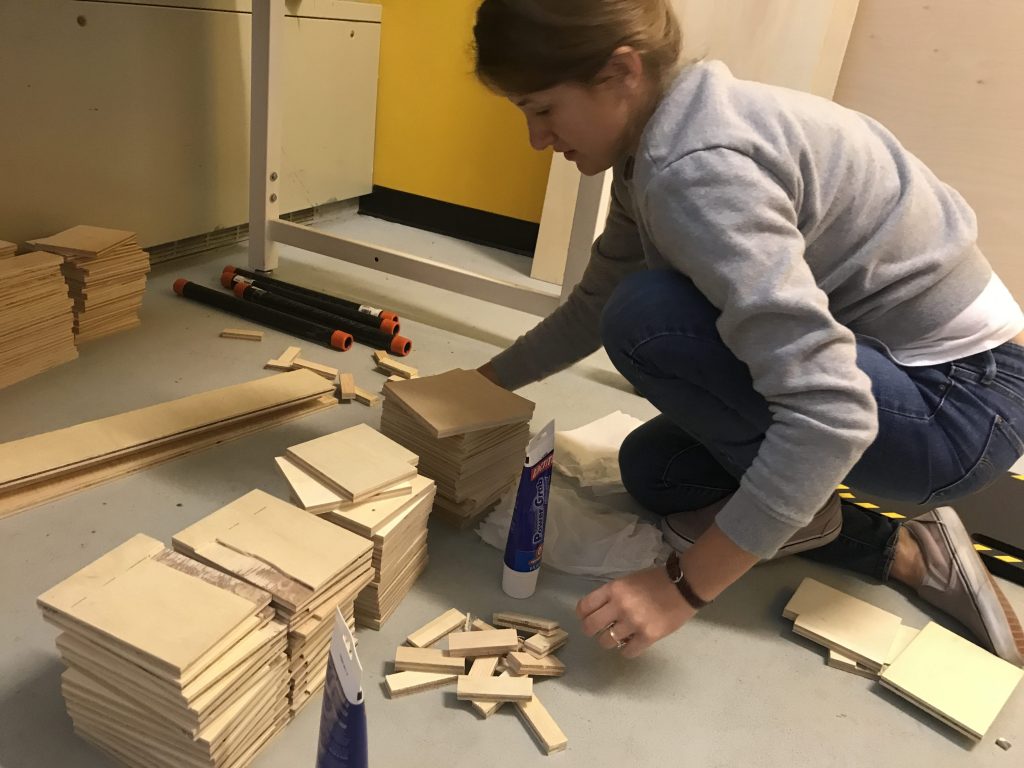
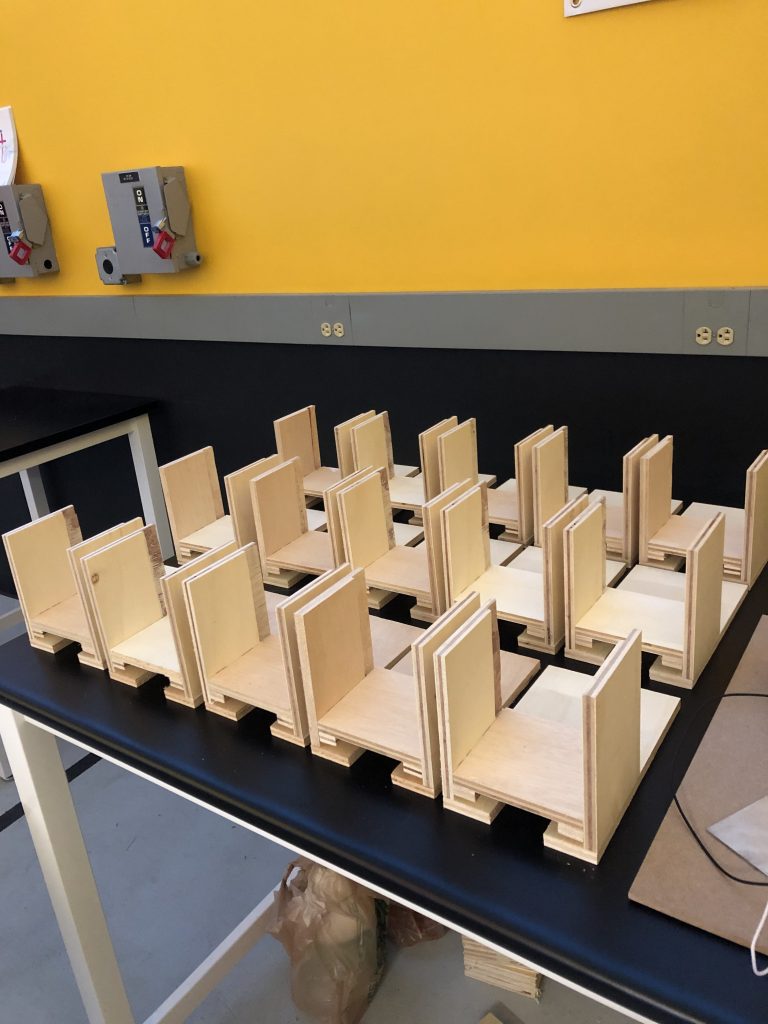
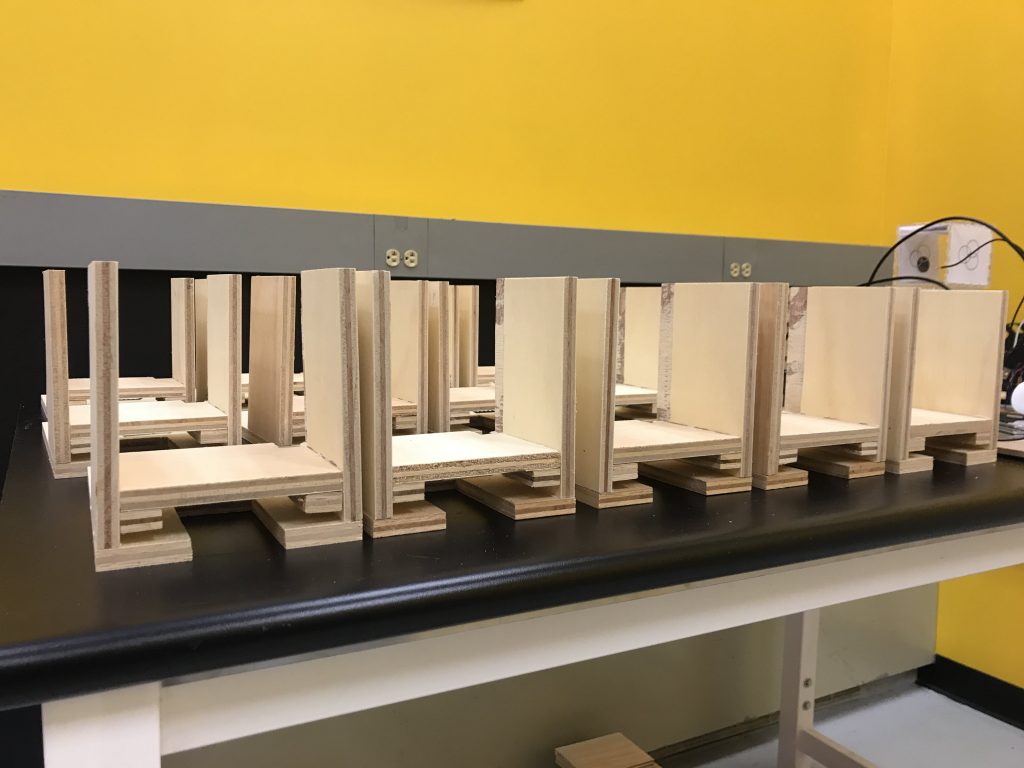
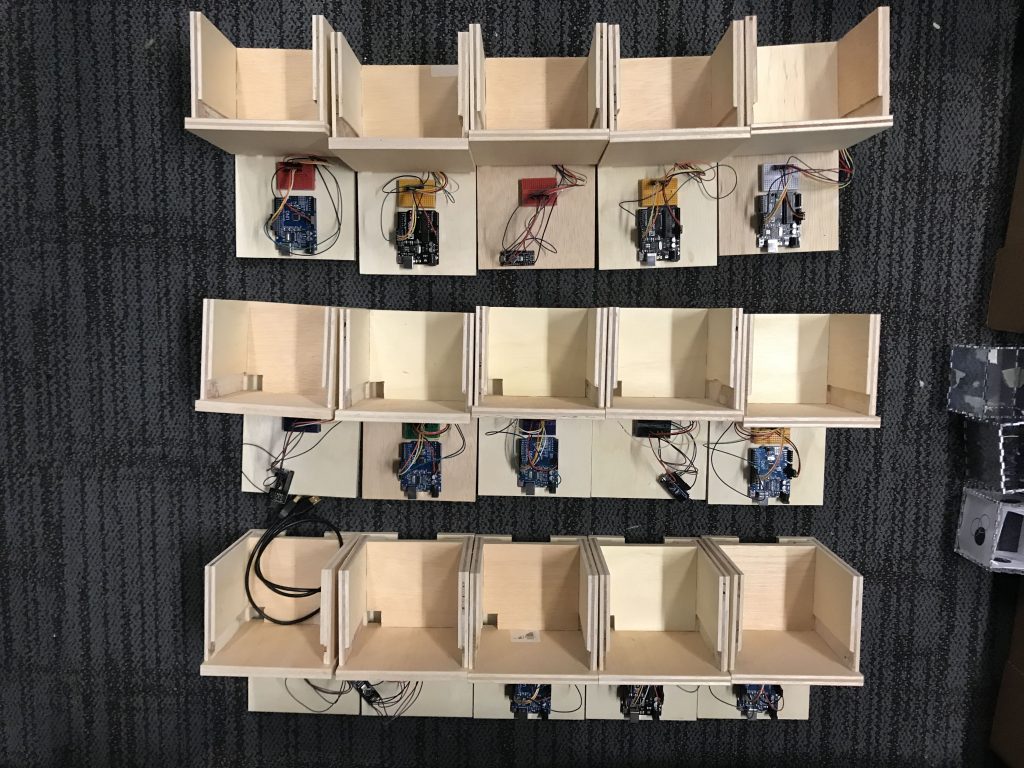
But don’t worry, this didn’t throw us off course! We continued to fabricate this week, mass producing 16 modules. With the gold spike proved out, we were able to just mass replicate and finish building and installing the tech in just 3 days.
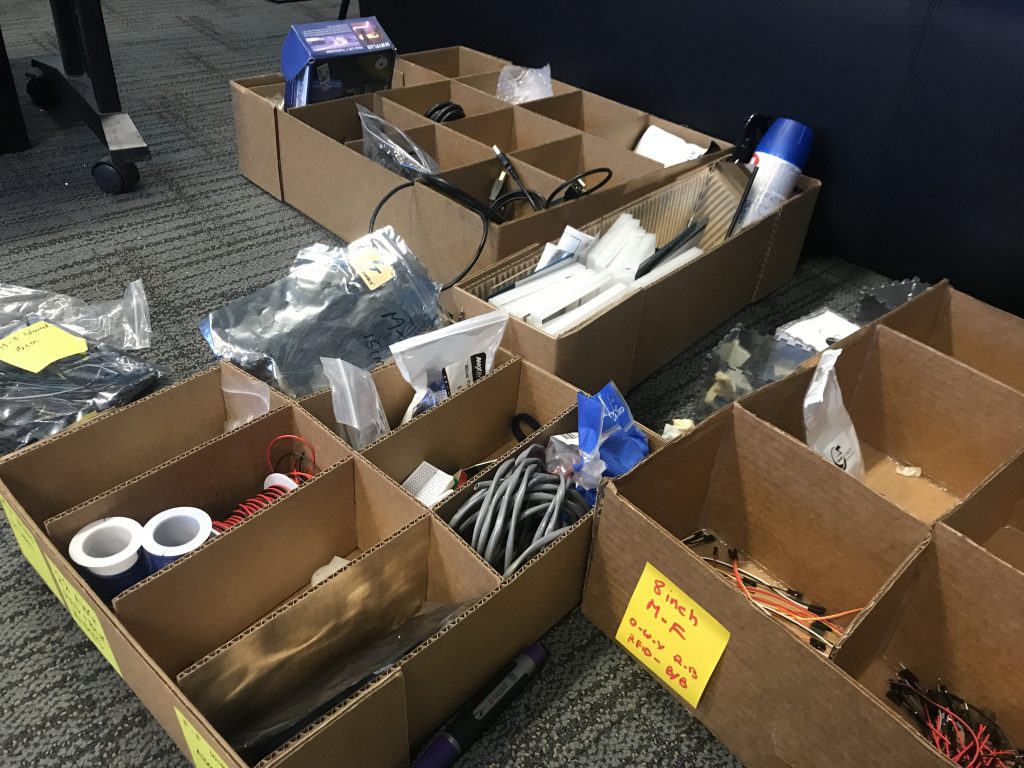
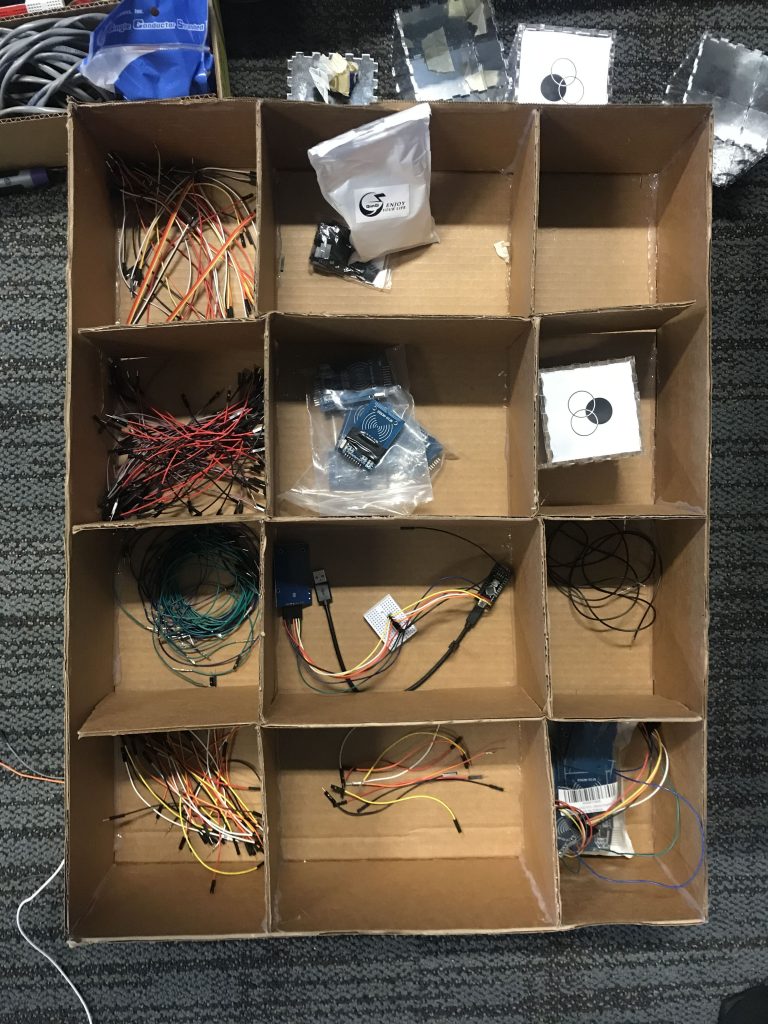
We got all of our tech and materials organized into neat cubbies (thank you to Marissa, our Fab Queen for creating wonderful organizers).
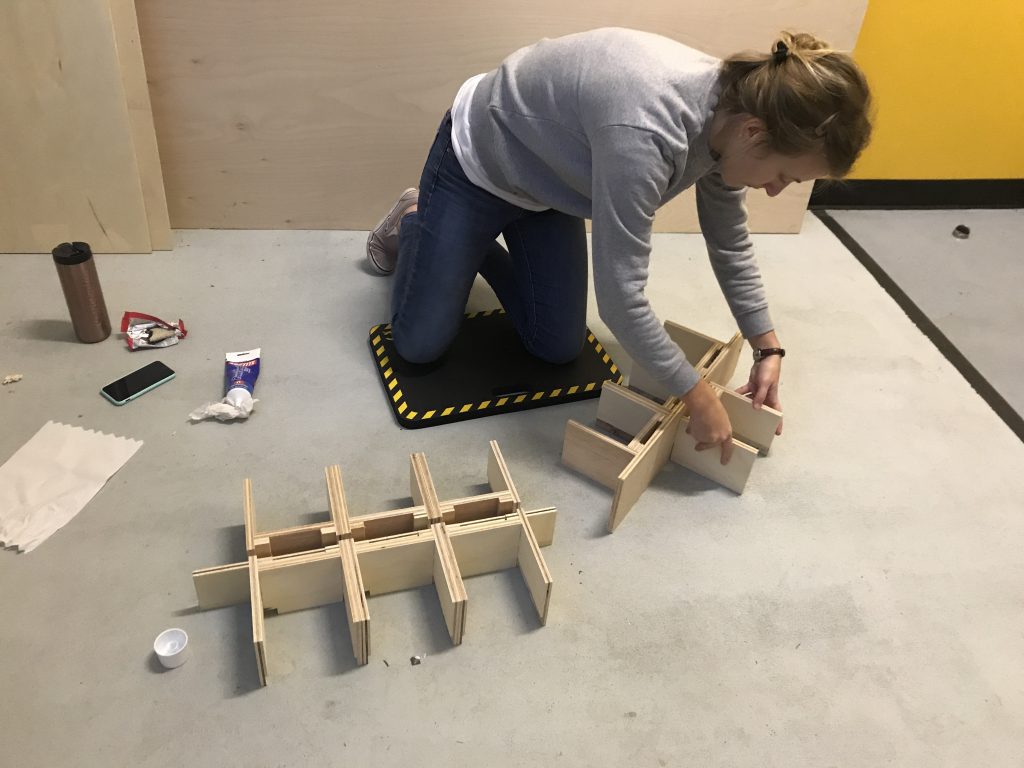
Emily and I glued all the modules together.
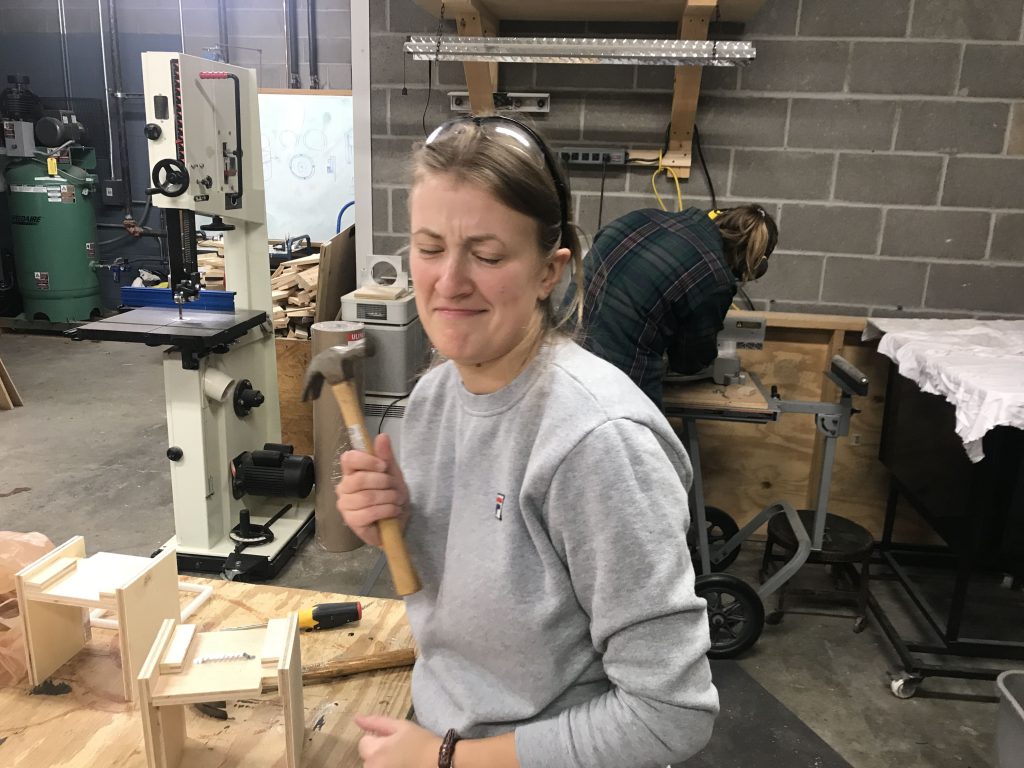
Emily hammered in brackets to hold the RFID receivers at the bottom. If anyone was wondering about robustness, Emily literally slammed the incomplete modules with a hammer… repeatedly.
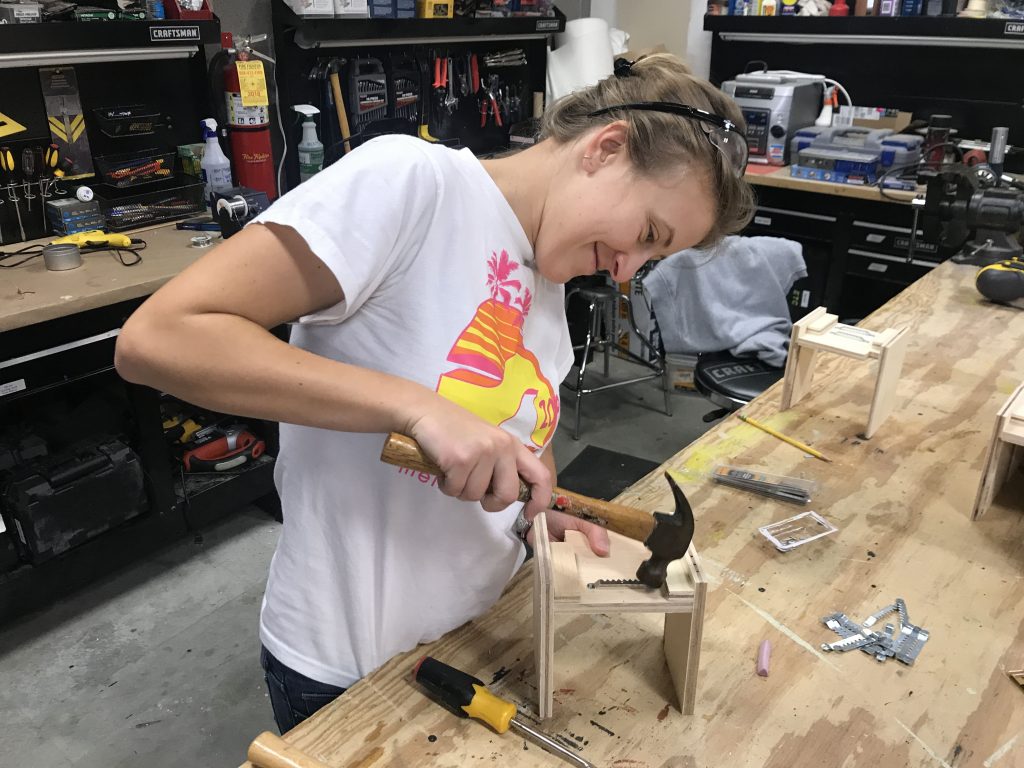
Then we added in the bottom of the modules, and used a nail gun to reinforce the sides and bottoms.
From there, we began to install prep tech for install. Nidhi painstakingly separated out all the appropriate wires for us, and we all began to use her layout to connect all the components together.

Ta da! 16 modules with tech inside them! (If you have a keen eye, you’ll notice there’s one missing… don’t worry, he was just out for testing.)
Concurrently, Marissa began to experiment with block materials and designs. Since we are waiting on supplies to come in, we’ll continue to prototypes blocks to test next week.
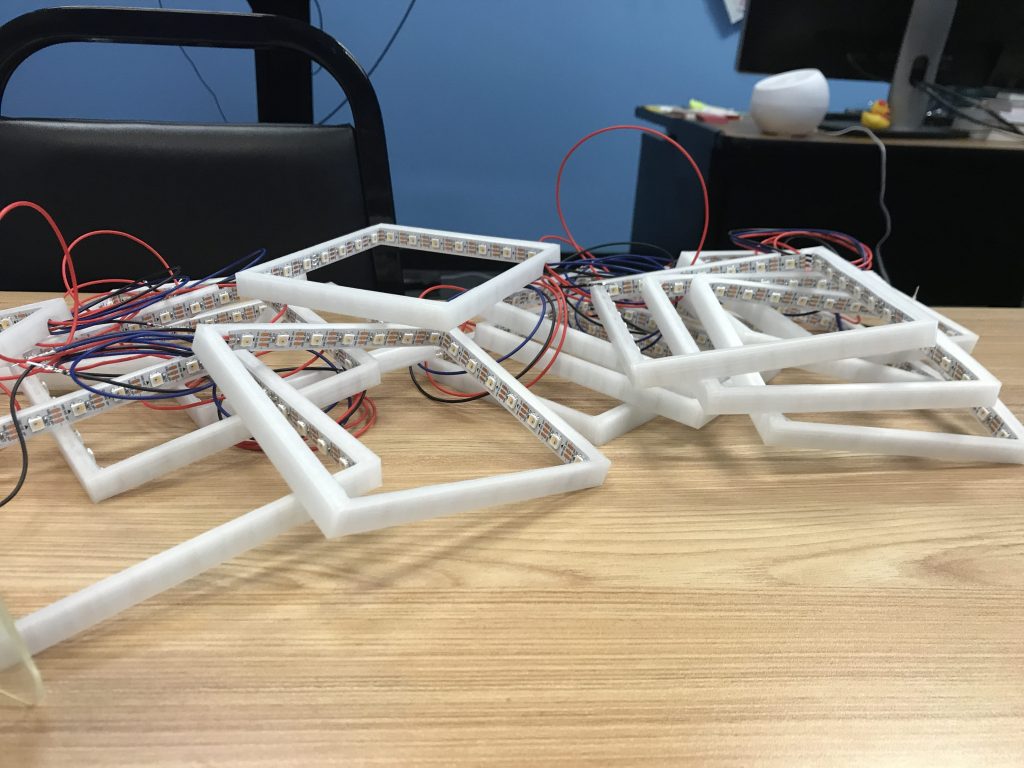
But we have a few cute wooden framed blocks for now! These proved to be quick to assemble, but we’ll need to make the edges thinner as right now the RFID tags can’t be read. Since we’re also waiting on RFID stickers to come (we took the Museum’s advice about exposing the tech), the specs for the blocks may change depending on the signal reach of the stickers.
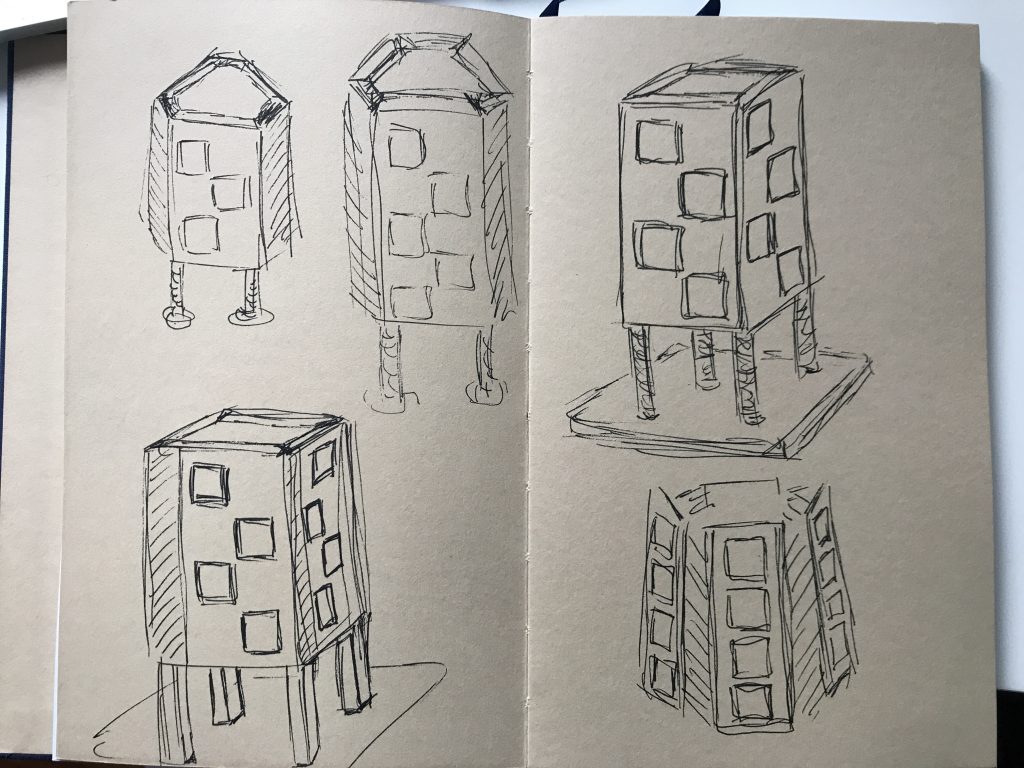
Since we decided to move forward with our frame. Marissa met with Mo to discuss a variety of layout options. Remember these from last week, when John Balash asked us to explore rotating the cubbies?
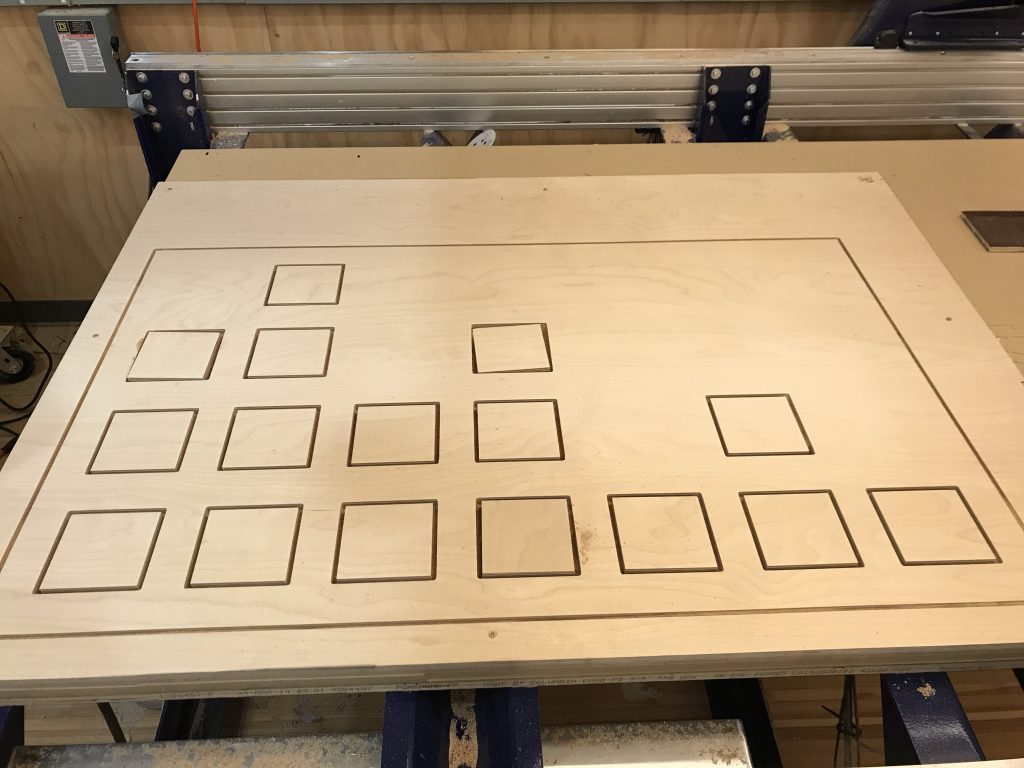
Mo discussed being more intentional with the design, asking what’s the reasoning behind the layout? He also suggested looking to the Fibonacci sequence. From there, Marissa explored a variety of options looking at the RGB color spectrum through the lens of frequencies and wavelengths.
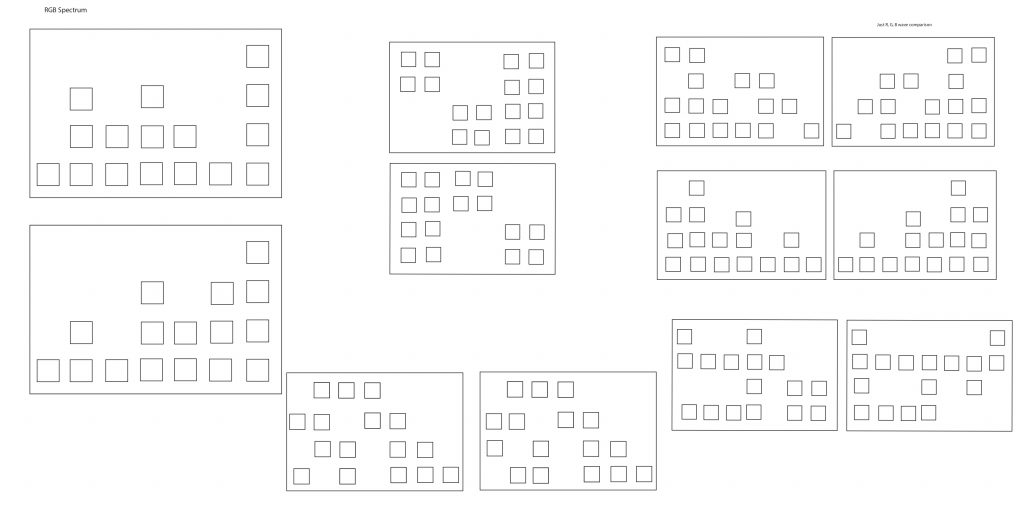
From there we narrowed it down to two options that we felt strongly about. We liked that these layouts were dynamic, had the potential for interesting hidden interactions, and that they actually showed the relationship between wavelength and frequency in the color spectrum! Funnily enough, the two of our favorites were only one block apart in design.
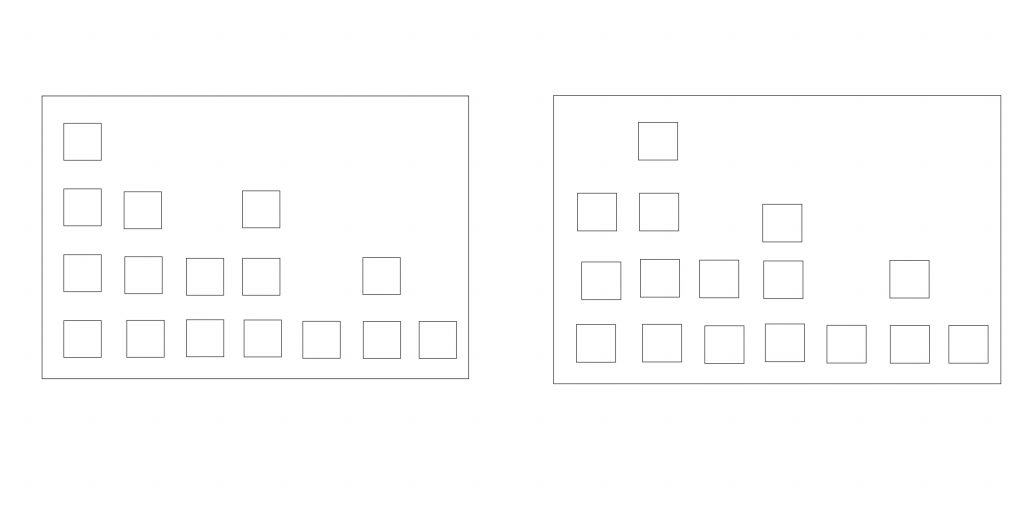
Ultimately, we landed on this design for the front, which we’re really happy with!

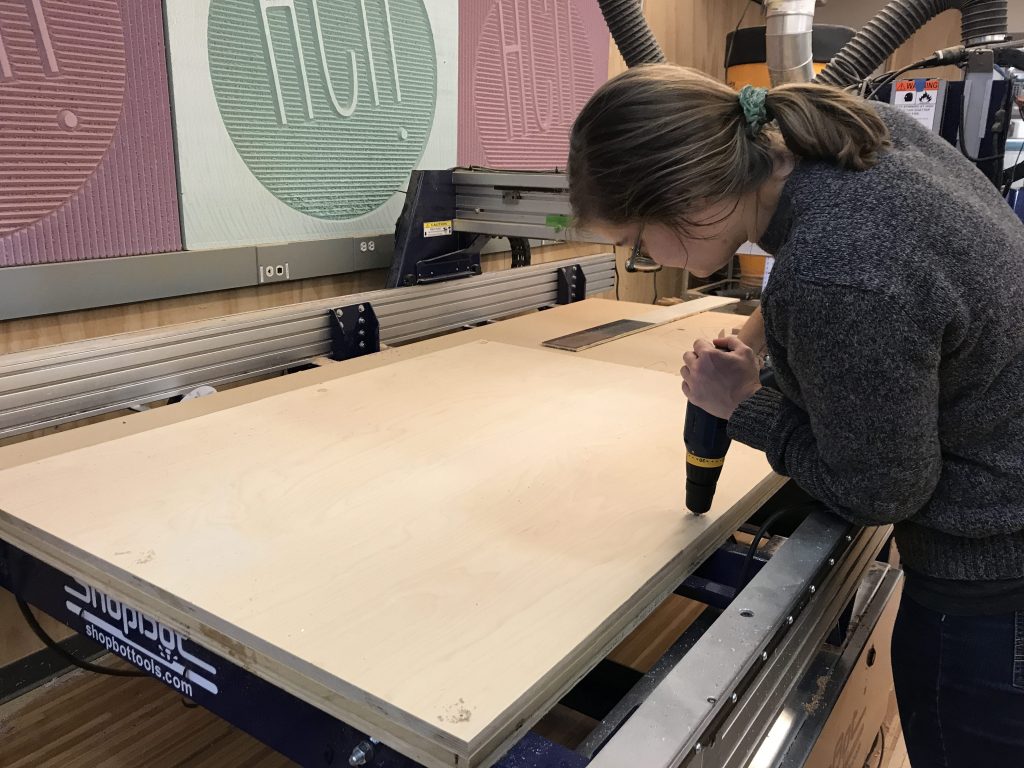
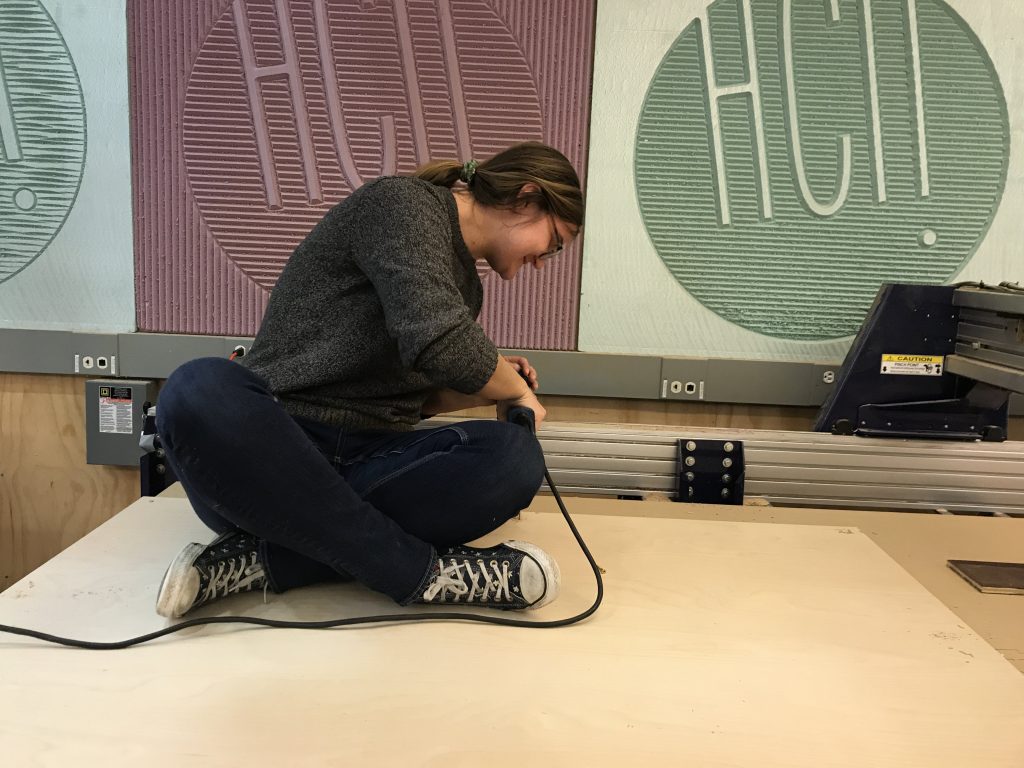
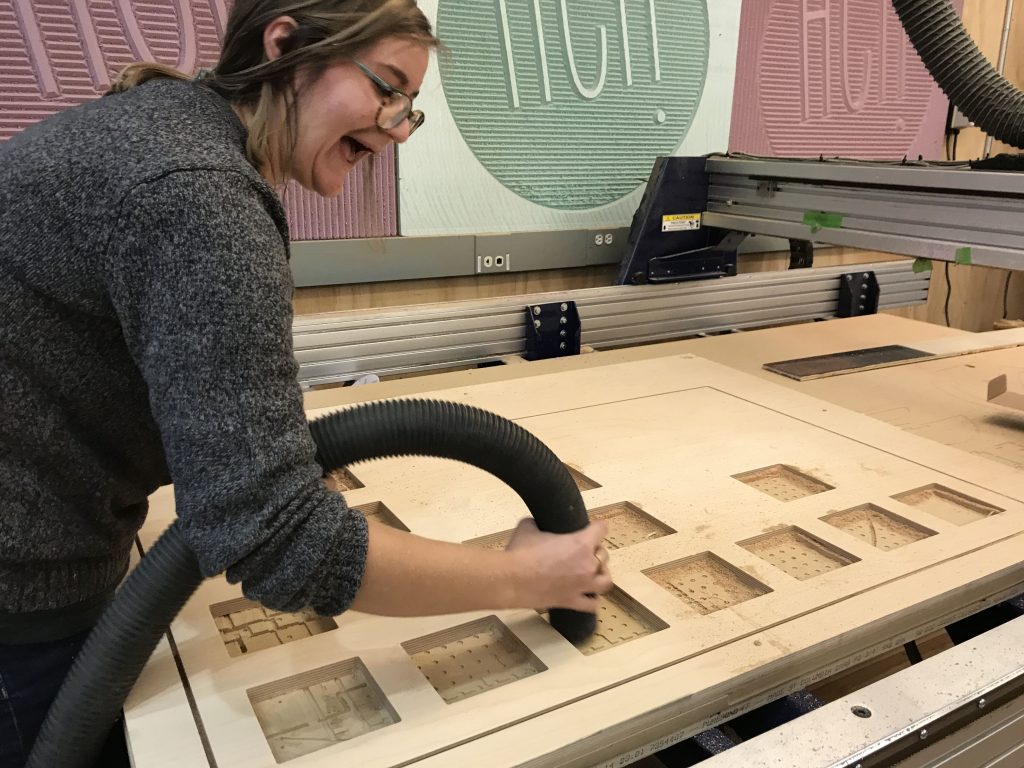
And in the craziest turn of luck, HCII’s Future Interfaces Group got back to us about using their CNC machine and we were able to get a time slot on Saturday to CNC the front! Conor Triplett, Producer of Front Seat, was kind enough to last minute volunteer to drive our giant multi-ply up to main campus. John Antanitis, Technical Assistant at IDeATe, was able to train Marissa and I on using the machine and cut out the front. He was so incredibly helpful and patient with us as we learned how the machine converts our drawings into XYZ coordinates. We learned how to properly use a CNC machine; double-checking all the files, screwing in the board, and vacuuming all the sawdust out before removing the final piece. We’re so happy with the way that it turned out! (It only took an hour to be trained and half an hour to CNC!)
This week was really a group effort on everyone’s part! So much thanks to everyone who helped us out!
Radio Silence
And now a note from our master programmer, Nidhi, regarding the most anticipated event of the fall:
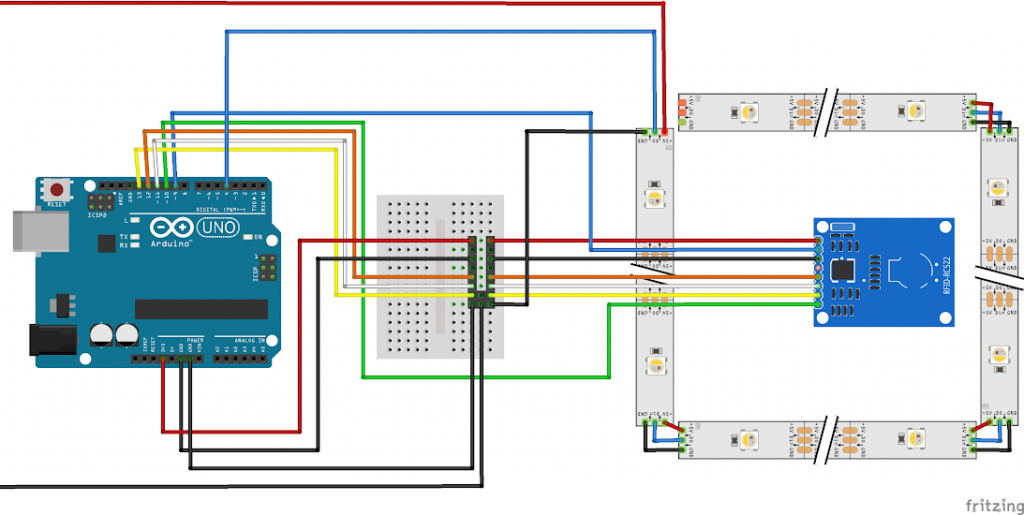
“We got the radio to work with the Arduinos fairly quickly, even before halves. We were quite positive that we could add them to the current module within no time.
However, it was soon evident that the radio modules were not working with the RFID on the same Arduino. After some research we tried a few suggested methods to work around this. The fundamental technique was to disable the RFID when the radio needed to work and vice versa, so they would not interfere with each other. It even worked a few times but was very inconsistent. We spent a lot of time trying to understand why. It was first an issue with the code and on changing that it again showed a little success but for a very short time.
We took David Purta’s help to test the hardware. We used an oscilloscope to test signals sent out by the code, which was fine. We checked the transmission signals of the radio module, which was consistent as well.
The issue turned out to be the RFID RST pin. It was giving out garbage data, making it unable to disable. Without disabling the RST pin the radio module would never work. We soon realized that although this issue is certainly solvable, it would take us a long time to understand how to solve it completely, given that none of our team members had major hardware experience. It was eating into precious time that we could use to make the working parts better.
We now plan to use wired, serial communication between the Arduinos. This is less efficient, but easier to implement and gives more time to think of interesting and fun interactions possible with the communication.”
Next Steps:
- Prep and assemble the frame
- Spray paint/adhere mirrored sides to cubbies
- Push code to all the modules + test
- Prepare for ETC Playtest Day
- Attempt to use wired serial communication between Arduinos
- Continue to prototype blocks and symbols